|
Final Fantasy Labyrinth of Time
The Labyrinth of Time is the new bonus dungeon for the PSP release of Final Fantasy. It contains 30 different floors, with challenging puzzles, ending with a insane boss battle. To make it through the Labyrinth, you must complete ten randomly chosen puzzle floors. You will begin in the Modern Maze each time, but there after, the choices will be completely random. The boss awaiting you at the end of your journey will completely depend on your performance in the puzzle floors.
Inside the Labyrinth of Time, the save feature and any teleportation spells have been disabled. So basically, once you step in, you are there. However, there are floors placed randomly in the trip through, that can telelport you out of the Labyrinth.
To gain access to the Labyrinth, you must have defeated all four elemenetal fiends. You do not, however, need to beat the bonus dungeons. Just advence the story to where you are ready to go back in time to face Chaos.
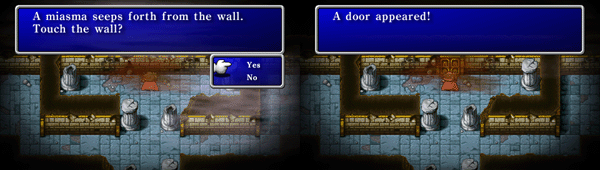
Return to Cornelia, and speak to the cloacked figure. Follow him out and to the Temple of Chaos. At the back wall, examine the Miasma eminating from the wall to open the door. Speak to the figure again, and listen to everything he tells you (below).
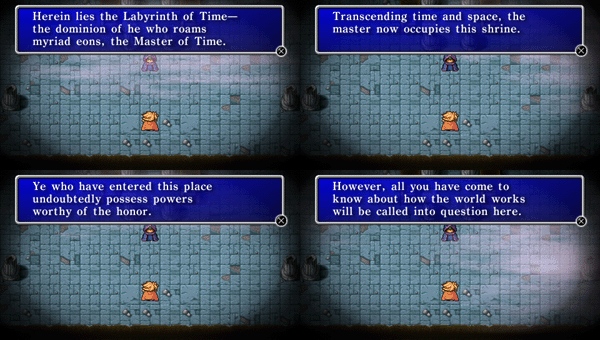
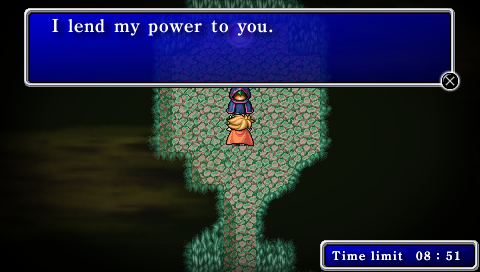
Once he has told you about the Labyrinth, step into the light pillar, to begin your journey. But before you do, there are a few things to go over.
Each of the levels inside begin with the Light of Time providing you with a list of abilities to sacrafice, in order to gain more time on the clock. You do not have to choose any more than one, but the less sacrafices you make, the less time you will have to finish the floor. So choose what you feel will work in the floor you are in.
Each floor's challenge begins when you activate the stone tablet inside. It is close to the beginning of the floor most of the time, but not always. And the timer is ticking fromt he very beginning. So you need to find it very quickly.
If you complete the level with time remaining on the clock, you can break the blue seal. If you complete the floor after the time expires, you will break the red seal. If time does run out, you will lose HP/MP for every second after and enemy encounters come more frequently. So it is better to hit the time alloted for the floor.
*NOTE* Regardless of the seal broken, the column of light you step through will still lead to the next floor. However the number of blue seals you break in your trip through determines which version of Chronodia you will face. Additionally breaking a blue seal is required to unlock the next stage in the Time Chamber.
Here is the list of possible abilities you will get to choose to sacrafice for time, as well as what the sacrafice will mean.
| No Fight Command |
Fight command is disabled |
No Magic Command |
Cannot use Magic |
| No White Magic Command |
Cannot use White Magic |
No Black Magic Command |
Cannot use Balck Magic |
| No Item Command |
Cannot use Items |
No Recovery Items |
Cannot use Recovery Items |
| No Attack Items |
Cannot use Attack Items |
No Flee Command |
Cennot flee from battles |
| No Dash Ability |
The auto-dash ability is disabled |
Attack Halved |
Party's Attack is reduced |
| Defense Halved |
Party's Defense is reduced |
Accuracy Halved |
Party's Accuracy is reduced |
| Evasion Halved |
Party's Evasion is reduced |
Intelligence Halved |
Party's Intelligence is reduced |
Now that there is a general knowledge of how to proceed through the Labyrinth of Time,lets head in. Below is each of the 30 possible floors, and their directions as given in game. A list of the possible sacrafices will accompany each one, as well as a little bit on how to get through the floor. Hope this will help those who are stuck inside the Labyrinth.
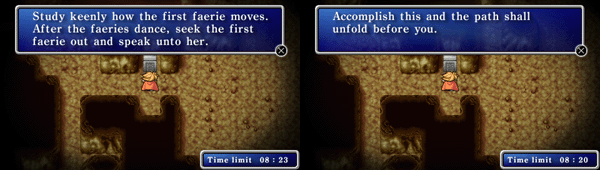
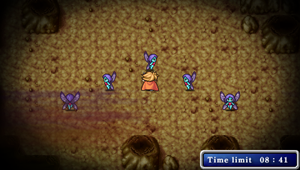
Faerie's Frolic
| No Magic Command |
| No Item Command |
| No Flee Command |
Watch the first faerie closely, and memorize its movements. When it leaves, five will appear. You must choose the first faerie based solely on how it moved. If you get it wrong, they will scurry off, and shuffle before returning for another chance. The only thing you lose from a wrong answer is time taken for the faeries to re-shuffle.
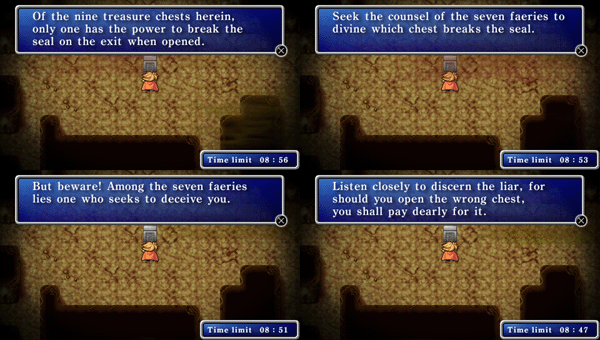
Faerie's Farce

| No Fight Command |
| No Magic Command |
| No Flee Command |
| No Dash Ability |
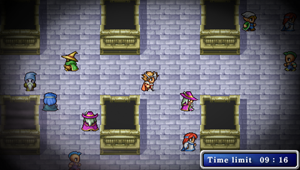
There is a total of 9 chests, but only one has the key to break the seal. There are seven faeries in the area, that can provide hints as to which it is, but you should be warned that one of them is lying. Speak first to all the faeries, determine which of them contradicts the others, and find the chest. If you get it wrong, the remaining time is cut in half.
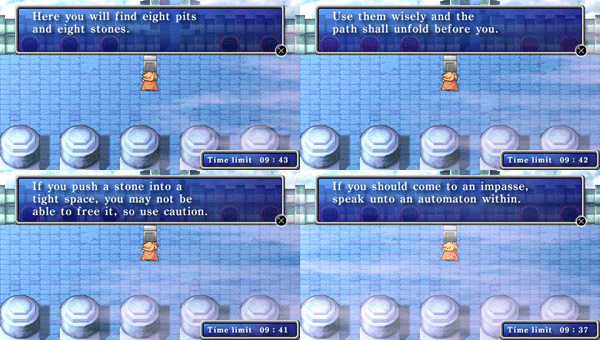
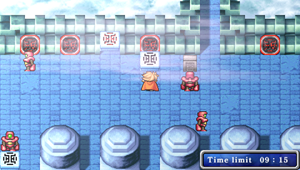
Neat and Tidy
| No Magic Command |
| No White Magic Command |
| No Black Magic Command |
| No Item Command |
| No Recovery Items |
| No Attack Items |
| No Flee Command |
| No Dash Ability |
| Attack Halved |
| Defense Halved |
| Accuracy Halved |
| Evasion Halved |
| Intelligence Halved |
The goal here is to place the stones in the open spots on the north wall. Any time a stone comes in contact with a robot, the stone is destroyed. Speaking with the robot at any time will reset the stones for you. Stones that have been correctly placed will remain where they are. To get through this quickly, minimize moving the stones in a east-west pattern, and focus on getting them northwards. Longer paths with the stones adds more time, and adds a greater chance of being touched by a robot.
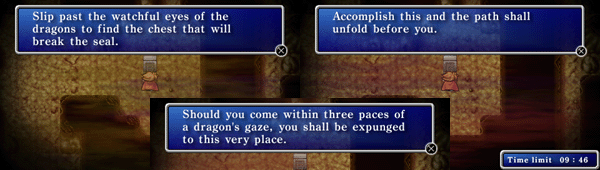
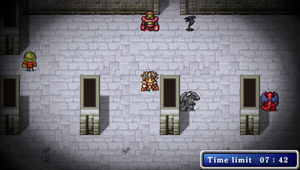
The Guardian
| No Fight Command |
| No Magic Command |
| No White Magic Command |
| No Black Magic Command |
| No Item Command |
| No Recovery Items |
| No Attack Items |
| No Dash Ability |
They key is hidden in one of three chests in the area, guarded by dragons. These dragons move in a set pattern, though there is a bit of variance in their timing. You cannot be seen by one of these dragons, or you will be teleported back to the beginning. You need to try and get past them quickly, while their backs are turned. This is one of the more challenging of puzzles, and has been noted to turn people off of the Labyrinth. Just be patient, and work through this puzzle slowly. It would be one I would suggest doing while you have time to spare.
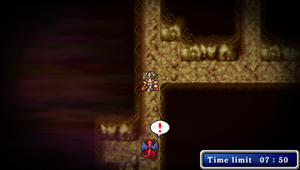
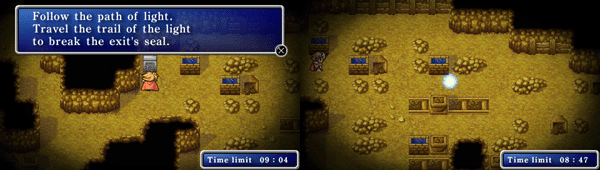
Path of Light
| No Magic Command |
| No Item Command |
| No Flee Command |
| No Dash Ability |
Watch the light travel its path, and follow it exactly. If you make a mis-step, the light will reappear and go along its path again. If you reset the puzzle, the path will be different, so try to get it without doing so. Just pay close attention, and you will be fine.
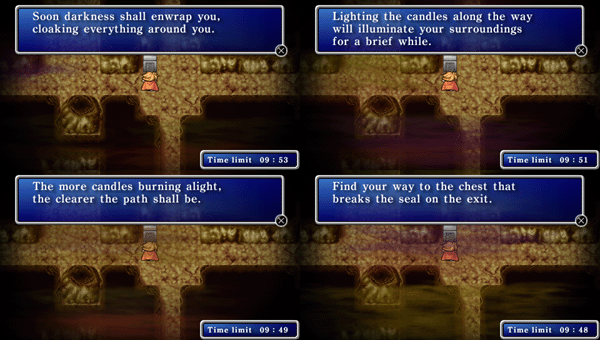
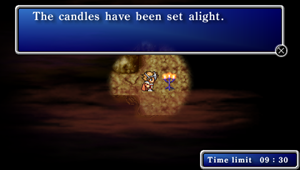
Labarynth of Darkness
| No Fight Command |
| No Magic Command |
| No Flee Command |
| No Dash Ability |
Light the candles to make seeing easier for you. If candles go out, the light will shrink to nothing. The chest never moves in this puzzle, so if you know the way just get to it already!
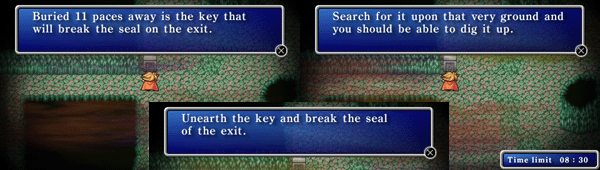
Scavenger Hunt

| No White Magic Command |
| No Item Command |
| No Recovery Items |
| No Dash Ability |
| Attack Halved |
| Defense Halved |
| Accuracy Halved |
| Intelligence Halved |
Once the tablet gives you the distance to the buried key, use single taps on the controller to move. This will allow you to keep count of your steps easier. If the wrong spot is chosen, you might get into an enemy encounter. After the battle, the game provides an update to the new distance. *Note* Moving diagonally will count as two steps, since it is two squares from your position. (Diagonal movement is not allowed in Final Fantasy)
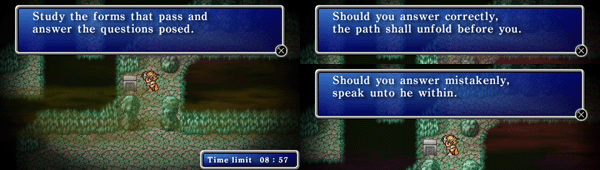
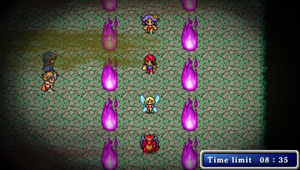
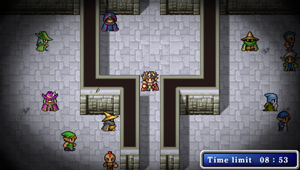
March of Souls
| No White Magic Command |
| No Item Command |
| No Recovery Items |
| No Flee Command |
| No Dash Ability |
| Attack Halved |
| Defense Halved |
| Accuracy Halved |
| Intelligence Halved |
Speak to the cloaked figure, and a series of previously seen enemies will march down between the pillars of fire. After they have completed their march, the cloaked figure will ask 3 multiple choice questions. You must answer them all correctly, or he will march a different set of characters down, and ask different questions.
Unless you are really good with memory games, grab yourself a piece of paper and pen. This will allow you to write down the order of the characters as they appear. With the info in front of you, you cannot miss.
Bat cave
| No Fight Command |
| No White Magic Command |
| No Item Command |
| No Recovery Items |
| No Attack Items |
| No Dash Ability |
| Attack Halved |
| Defense Halved |
| Accuracy Halved |
| Evasion Halved |
| Intelligence Halved |
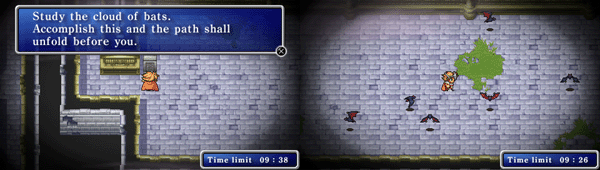
This is a simple and easy puzzle. (Though you might want pen and paper for memory) Simply walk through and take note of how many bats there are. And this also includes taking note of how many are moving, and how many are not moving. Answer the figures question at the end to break the seal.
Bat-A-Bing!
| No Fight Command |
| No Magic Command |
| No Flee Command |
| No Dash Ability |
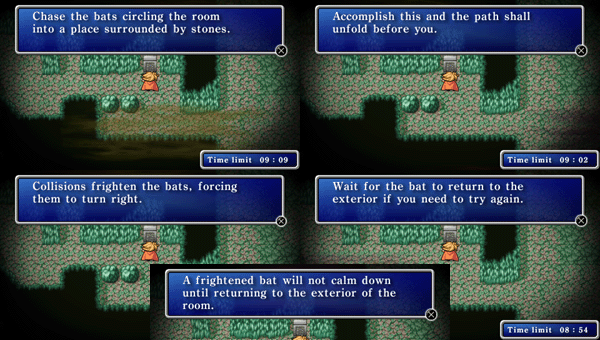
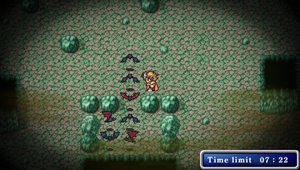
In this puzzle, you must corral the bats into the center area. Standing at the entrance, use the "Bat's Logic" (Bats turn right when they hit something) in order to backtrack through the path the bats need to follow to get into the center area.
If you do not want the Blue Seal, simply go to the top center of the room, and wait for the bats. When they go away from the party, take a step back and wait. Repeat this process, until they are in. This is just painfully slow, but it will succeed.
Trial By Fire

| No Fight Command |
| No Magic Command |
| No Item Command |
| No Dash Ability |
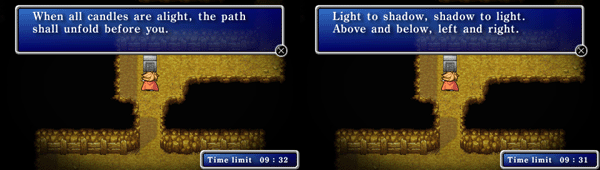
Ok, this one has a set of candles. Each candle you interact with will turn off/on all of the candles immediately around it. The goal...get all of the candles lit at the same time.
There is a random number of candles burning when the trial begins. The key to winning is lighting the most candles with the least amount of touches.
The solution should never involve turning off a candle, then relighting it. If you get stuck with a single candle, or cannot get it to work, leave the puzzle area to reset it.
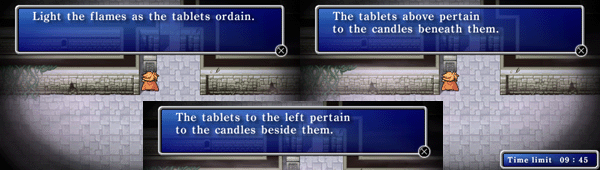
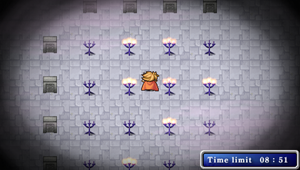
Fire Drill
| No Fight Command |
| No Magic Command |
| No White Magic Command |
| No Black Magic Command |
| No Flee Command |
| No Dash Ability |
| Attack Halved |
| Defense Halved |
| Accuracy Halved |
| Evasion Halved |
| Intelligence Halved |
Read the tablet, and light the correct candles in the 4x4 grid. The tablets will provide clues as to which to light to continue.
Begin by reading the tablets to determine how many you must light. If the tablet says light them all, do so immediately. If it says to light three candles, hit the center pair. This becomes a very tricky trial if it asks to light alternating candles, and that just has to be a lot of trial and error to get through.
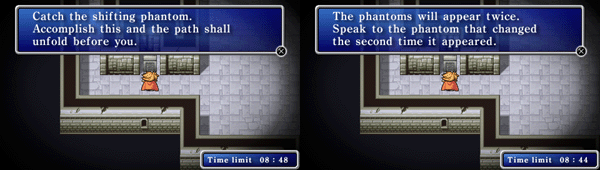
Specter Inspector
| No Fight Command |
| No Magic Command |
| No Item Command |
| No Dash Ability |
| Attack Halved |
| Defense Halved |
| Accuracy Halved |
| Evasion Halved |
| Intelligence Halved |
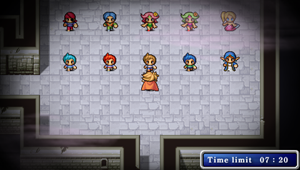
Several specters will appear and walk off the top of the
screen. When they come back you must guess which one is different among them
from when they first appeared. This goes on for 5 rounds. At first it's only
which character is completely different then it moves on to the direction
they're facing. If you guess right you progress to the next round. If you
guess wrong you have to fight a battle that could be tough depending on what
abilities you sacrificed. You just have to retry the current round though if
you guess wrong, not start all over again (thank goodness), the characters
will even be the same but the one that changes will be different. The first
round has 5 characters and you need to guess which character's different, the
second round has 10 characters and you need to guess which one is a different
character again, the third round has 3 characters and you need to guess which
one is facing a different direction, the fourth round has 5 characters and
direction facing again, the fifth and final round has 10 characters and you
need to guess the different direction again OR which one is a different
character (could be either). This Challenge can be difficult if you have a
bad memory, but just keep at it and you'll get it through the process of
Beat the Heat
| No Magic Command |
| No White Magic Command |
| No Item Command |
| No Recovery Items |
| No Dash Ability |
| Attack Halved |
| Defense Halved |
| Accuracy Halved |
| Evasion Halved |
| Intelligence Halved |
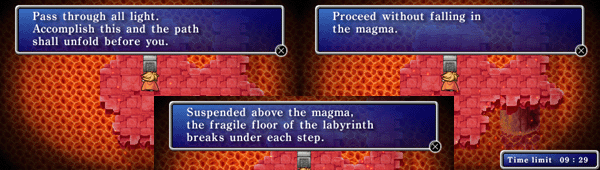
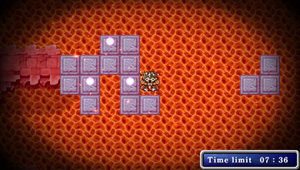
You must walk over a bridge and pass through each of the points of light
along the way to pass this challenge. The catch is that as soon as you step
on a tile it will disappear a split-second later. You must walk quickly
across the tiles to the lights along a single path and make it to the other
side. If you fall in the magma you'll need to start over again. Not too hard
if you plan your path out before starting across.
Thunder Alley

| No Fight Command |
| No Magic Command |
| No White Magic Command |
| No Black Magic Command |
| No Item Command |
| No Recovery Items |
| No Attack Items |
| No Dash Ability |
| Attack Halved |
| Defense Halved |
| Accuracy Halved |
| Evasion Halved |
| Intelligence Halved |
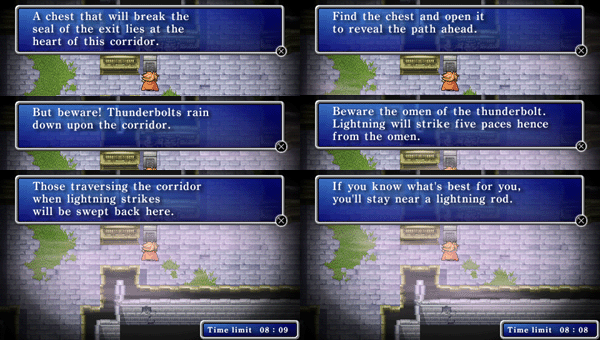
Make your way to the center of the maze to find the chest with the light in
it. However, whenever the screen flashes it means that lightning will strike
you after you take your next 5 steps. Stand near a lightning rod to remain
safe from the lightning, otherwise you will be brought back to the beginning
of the maze. Not too tricky, just make sure you walk around a lightning rod
until lightning strikes whenever you see a flash, and then go directly to the
next closest rod while working your way to the chest.
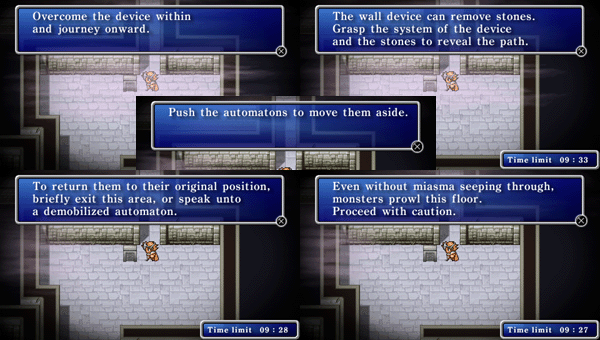
Mechanical Madness
| No Fight Command |
| No Magic Command |
| No White Magic Command |
| No Black Magic Command |
| No Item Command |
| No Recovery Items |
| No Attack Items |
| No Dash Ability |
| Attack Halved |
| Defense Halved |
| Accuracy Halved |
| Evasion Halved |
| Intelligence Halved |
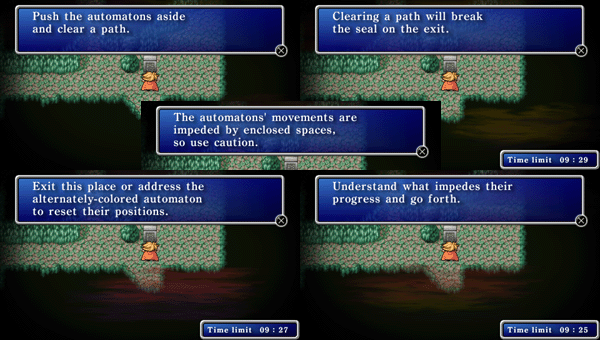
Push the robots out of the way by talking to them and figure out a way
through the maze. If you get stuck talk to the red robot to reset the maze.
Not too difficult and you get lots of time for trial and error.
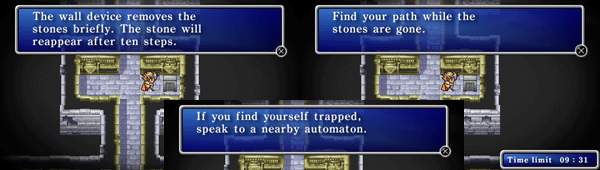
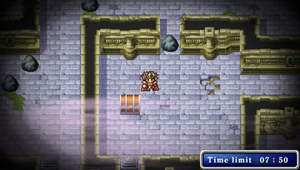
Stone Trap
| No Fight Command |
| No Magic Command |
| No Black Magic Command |
| No Item Command |
| No Attack Items |
| Attack Halved |
| Defense Halved |
| Accuracy Halved |
| Evasion Halved |
| Intelligence Halved |
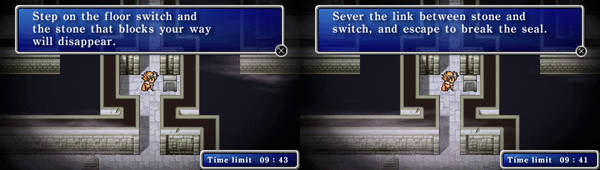
Press the wall switches to make specific rocks disappear and clear your path.
However, rocks will only disappear for 10 steps from when you pressed the
switch. You must figure out the correct sequence of switches to get to the
exit. To add a little more temptation to the labyrinth there are treasure
chests scattered throughout the maze that contain some stat enhancing items as well as recovery items. Once you collect an item, it will not reappear if the puzzle is reset.
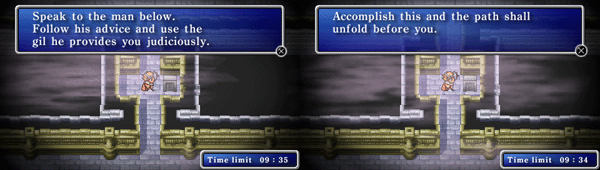
Flower Sale
| No Magic Command |
| No Black Magic Command |
| No Item Command |
| No Recovery Items |
| No Flee Command |
| No Dash Ability |
| Attack Halved |
| Defense Halved |
| Accuracy Halved |
| Evasion Halved |
| Intelligence Halved |
You are given a specific amount of Gil to spend and must spend the exact amount to pass the challenge. To spend the Gil you must buy Flowers
from the various characters walking around the area. The best way to do this
Challenge is to talk to everyone and write down how much each character is
selling for, then figure out who you need to buy from to spend the exact
amount of Gil. There are usually multiples of the same character but you can
figure out which is which by how much they're selling for when it comes time
to buy. Tip: You can check your Gil in the regular menu screen to see if
you've spent all your designated Gil.
Breakout
| No Fight Command |
| No Magic Command |
| No Black Magic Command |
| No Item Command |
| No Attack Items |
| No Dash Ability |
| Attack Halved |
| Defense Halved |
| Accuracy Halved |
| Evasion Halved |
| Intelligence Halved |
Press the floor switches to make specific rocks disappear and find a way
through the puzzle. Each switch makes certain rocks disappear/re-appear, and
some even affect rocks further along in the maze (which is the trick to
solving it in the end). Keep trying and eventually you'll get the right
combination. If it looks like you're stuck near the end try going back to
switches near the beginning to see if they affect the rocks near the end.
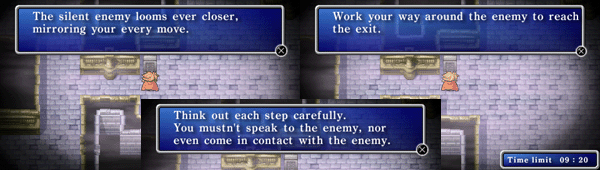
Mirror Image

| No Magic Command |
| No White Magic Command |
| No Black Magic Command |
| No Item Command |
| No Recovery Items |
| No Attack Items |
| No Flee Command |
| No Dash Ability |
| Attack Halved |
| Defense Halved |
| Accuracy Halved |
| Evasion Halved |
| Intelligence Halved |
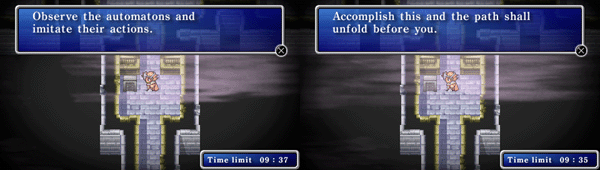
You must mimic the robot's movements around the square. You are give some
slack in this, so just stay clam and copy the robot the split second after it
moves (instead of trying to guess which way it's going to). There are 4
rounds of this, each increasingly harder and longer. If you mess up you only
have to restart the current round, thankfully. The last one is pretty long
though. Tip: Turn off auto-dashing if you have it on (and didn't sacrifice
Dash), it makes this much easier to just move at normal speed. This one can
be a real pain if you run out of time and have random battles start
interrupting you.
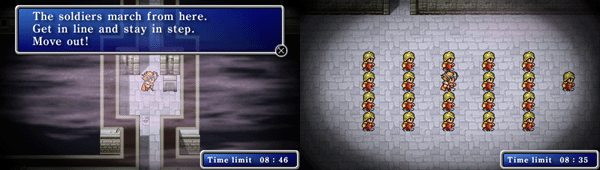
Marching Orders
| No Magic Command |
| No White Magic Command |
| No Item Command |
| No Recovery Items |
| No Dash Ability |
| Accuracy Halved |
| Intelligence Halved |
You must march in time with a group of soldiers. Go to the empty spot and
move when they do and stop when they do too. They move all the way to the
right first (stopping once or twice) and then all the way to the left
(stopping many times). If you touch another soldier or move when they're
stopped you fail and need to start all over again. Turning up the volume so
you can hear the "whistle" to start marching is the only tip I can really
give for this one. It is a very difficult Challenge depending on how good
your rythm and reflexes are. Good luck if you happen to go over the time
limit and random monsters start attacking you during the march! This one is
a PSP breaker...
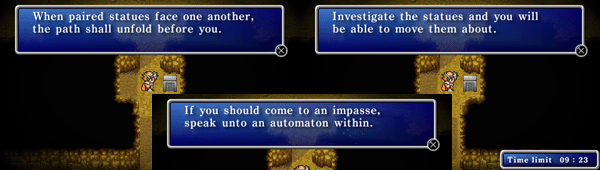
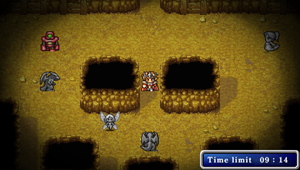
Twin Statues
| No Fight Command |
| No Magic Command |
| No Flee Command |
| No Dash Ability |
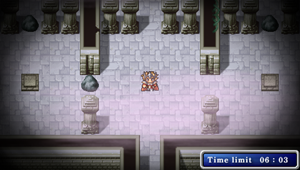
4 sets of statues are present in the room. You can interact with the statues
by either turning them or pushing them. You must make each set of matching
statues face and push them up next to each other in order to make them
disappear. Once they're all gone you'll pass the Challenge. If you get a
statue stuck you can talk to one of the robots to reset their position.
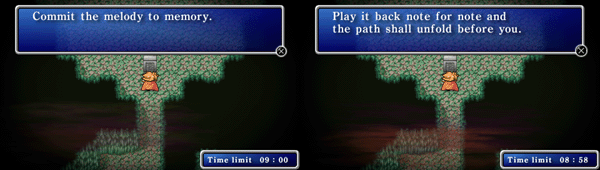
Note for Note

| No Fight Command |
| No Magic Command |
| No Item Command |
| No Recovery Items |
| No Dash Ability |
| Attack Halved |
| Defense Halved |
Eight coloured buttons will play and you need to walk over them afterwards in
the same order they played. There are 3 rounds to this Challenge. A classic
memory game. If you're having problems then just try thinking of the buttons
in a numbered order (1-8 from left to right) and then scribble down the
buttons that light up using these numbers.
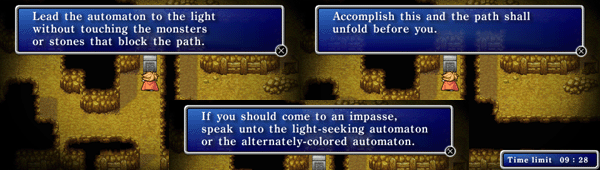
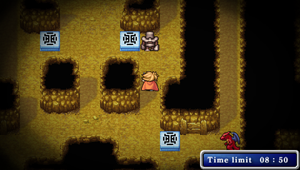
The Path to Peace
| No Item Command |
| No Flee Command |
| No Dash Ability |
| Attack Halved |
| Accuracy Halved |
| Evasion Halved |
| Intelligence Halved |
A robot will try to find the chest with the "light" inside it. Despite what
the tablet says you don't actually lead the robot to the light, instead it
follows a pre-determined path and you must clear it for the robot before it
reaches an obstacle. Obstacles include push blocks and dragon characters. You
must move the push blocks out of the way along the robot's path and defeat
the dragons (by 'talking' to them to initiate a battle). It's a little tricky
but eventually you'll figure it out.
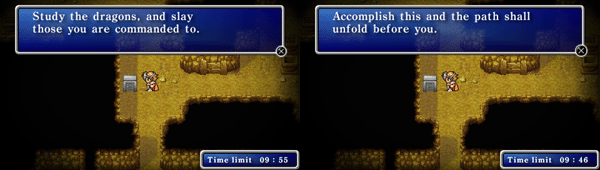
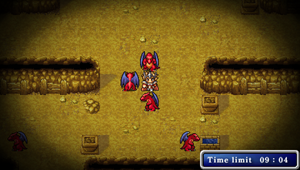
Slay or be Slain
| No Magic Command |
| No White Magic Command |
| No Black Magic Command |
| No Item Command |
| No Recovery Items |
| No Attack Items |
| No Dash Ability |
| Attack Halved |
| Defense Halved |
Kill the specific type and number of dragons. Based on how they appear as
their overworld character (on the map), NOT the Red Dragon you fight after
"talking" to them. There are three determining attributes: number of horns
(none, 2, or 4), length of tail (short or long), and length of wings (short
or long). It's hard to tell them apart and if you fail you have to start over
again. You must complete 3 rounds to beat the Challenge. Note that fleeing
from a battle with one of the wrong dragons will still count as "hurting it"
and cause you to fail. I find that taking quick notes of the dragon(s) you're
supposed to be hunting helps a lot, such as using "2-lw-st x3" to represent
needing to kill 3 dragons with 2 horns/short tail/long wings, or "0-sw-st x1"
to represent needing to kill 1 dragon with no horns/short tail/short wings. I
found that listing them in order from horns-wings-tail helped me to better
logically solve the puzzle when identifying the dragons, since it's then
using a top-down approach to their appearance (as opposed to the way the guy
tells you in horn-tail-wings order). Just pay close attention, keep a tally
of dragons you've killed, walk around the room quickly and you shouldn't have
too many problems.
Labarynth of Trials
| No Magic Command |
| No White Magic Command |
| No Black Magic Command |
| No Item Command |
| No Recovery Items |
| No Flee Command |
| No Dash Ability |
| Attack Halved |
| Defense Halved |
| Accuracy Halved |
| Evasion Halved |
| Intelligence Halved |
Make your way to the end of a complex puzzle maze. Along the way you'll have
to push robots the correct direction, press a button to remove a force field,
and press wall switches to make rocks temporarily disappear, all in order to
proceed to the end. To top it all off you will be attacked by random monsters
in this Challenge, regardless of your time. Think things through carefully
before doing anything and you should make it through this one eventually. If
you push a robot the wrong way and get it stuck talk to it to reset the maze
(and yourself at the beginning of it). For the rocks you'll probably need to
use a combination of switches to get to where you need to go in time, work it
out logically. The end of the maze isn't marked at all but you'll know when
you get there because the Seal will open. Having your Flee command helps a
lot here for saving time...
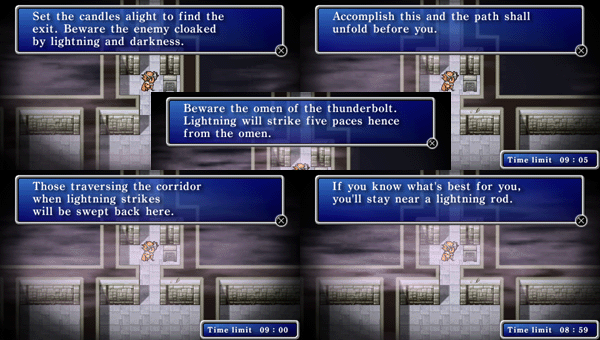
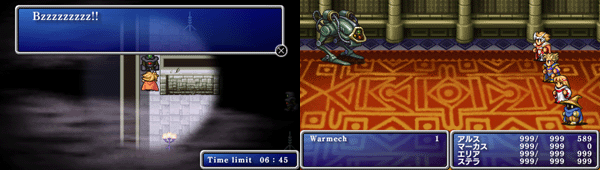
Labarynth of Disasters
| No Fight Command |
| No White Magic Command |
| No Attack Items |
| No Flee Command |
| No Dash Ability |
| Attack Halved |
| Defense Halved |
| Accuracy Halved |
| Evasion Halved |
| Intelligence Halved |
Walk around a dark room lighting candles and avoiding robots. Touching the
robots will make you fight a Warmech. Lighting the candles will make the
circle of light around you grow bigger. The candles will go out over time as
well. Once you've lit enough candles you will be able to exit the room (at
the bottom of the area) and break the Seal (not sure how many, but I don't
think you need to light them all). To complicate things even more you will
often see a flash on the screen, which means 5 of your steps later you will
be struck by lightning, sending you back to the start of the maze (but not
reseting it). The way to avoid this is to stay near a lightning rod when the
lightning strikes, which will save you. The only trick here is to stay near
those lightning rods whenever you see a flash. You can walk back and forth
around one to travel the 5 steps and force the lightning to strike there
while your safe.
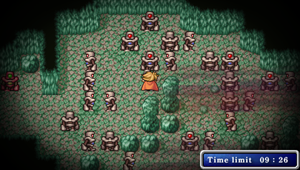
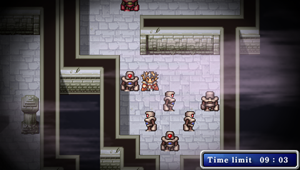
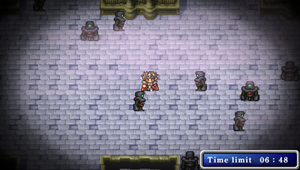
Step by Step
| No Fight Command |
| No White Magic Command |
| No Recovery Items |
| No Flee Command |
| Attack Halved |
| Defense Halved |
| Accuracy Halved |
| Evasion Halved |
| Intelligence Halved |
Travel from one side of the room all the way to the other side (on the
right). The only problem is that the room is full of robots that move as you
move, and if you touch one you'll enter into a tough battle with a Warmech
(2000 HP and they use Nuke). The good thing though is that they drop Genji
Armor (Knight & Ninja) and give great experience, so if you're have the time
feel free to try fighting a few, there's no penalty for fighting them except
for delaying you. Probably the fastest place to level up in the game.
Tricky Statues

| No Fight Command |
| No White Magic Command |
| No Black Magic Command |
| No Recovery Items |
| No Attack Items |
| No Dash Ability |
| Attack Halved |
| Defense Halved |
| Accuracy Halved |
| Evasion Halved |
| Intelligence Halved |
Similar to the "Twin Statues", except this time there are
monsters walking around the area too. However, the trick is that the monsters
only move when you move. If you touch a monster you will have to fight a
"tough" battle. Touch each set of statues together and facing each other to
make them disappear (along with all monsters that match that statue type).
There are 3 sets of statues.
Traveling Salesman

| No Magic Command |
| No White Magic Command |
| No Black Magic Command |
| No Item Command |
| No Recovery Items |
| No Attack Items |
| No Flee Command |
| No Dash Ability |
| Attack Halved |
| Defense Halved |
| Accuracy Halved |
| Evasion Halved |
| Intelligence Halved |
A parade of characters walk by and then you are given an "allowance" of Gil
to buy flowers from the ones that walked by. You must spend all the Gil, no
more and no less. When you talk to the characters that walked by they will
offer to sell you flowers, which is how you spend your Gil. However, one of
the characters offering to sell you flowers did not walk by and buying their
flowers will cause you to be short Gil. Also, there are many other characters
walking around the area that did not walk by, talking to one of them will
make you fight a battle against a single Revenant (quick and easy). The best
way to do this is to talk to all the characters and make a note of who is
selling flowers and for how much, without buying any. After you've talked to
them all add up all the amounts and then subtract how much Gil you were given
to spend, the difference should equal exactly how much one of the sellers was
asking for, indicating that one is the liar and the one you shouldn't buy
from. Now you can go buy flowers from the rest. Once you're done go talk to
the guy to complete the Challenge. Tip: You can check your Gil in the regular
menu screen to see if you've spent all your designated Gil, even if you're
capped for Gil (since you'll technically lose money here). Tip 2: It seems to
always be the same 8 characters: red mage - purple outfit, black mage - black
outfit, white mage - red hair, peasant girl - green hair/orange dress,
dancer - blonde/red dress, punk - blue hair/purple outfit, elf - white hat,
sage - blue hat... all of them sell flowers and one is always lying, use this
tip to avoid fighting everyone (if it's correct).
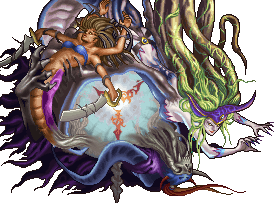
Space in Time
Once you have passed the 10 random floors, you will come into the Space in Time. Here you will face the greatest challenge to enter Final Fantasy I, in one of her 8 different forms. Before entering into this fight, lets make sure you are ready enough.
You should have The Ultima Weapon, as well as the strongest of weapons for each of your party members. Try to have your party above Level 80, just to help oput some. If they are too low, you will not survive the fight with any of the forms.
Just for a safe measure, try having at least 2 Rune Staffs, to cast healara. Personally I would suggest four of them, so you can spend a turn healing, while conserving MP, and providing enough to get everyone back into the fight. A Sage's Staff or two does not hurt to aid in keeping people alive.
And lastly, you will need your Gaint's Gloves (As many as you can get) to cast saber on your fighting crew. Once you have all of this ready, step over to the well to restore your HP/MP, and remove any negative effects. And get ready for the fight of your life!
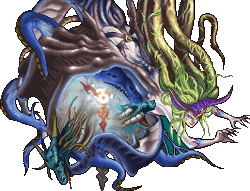
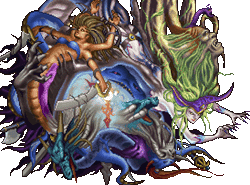
To determine which of the 8 forms you will face, please refer to this listing.
 = Blue Seal, = Blue Seal,  = Red Seal = Red Seal
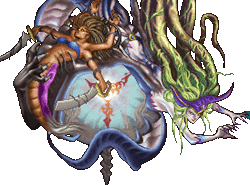
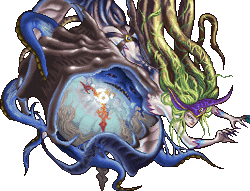
Bestiary #196 = (Chronodia in base form)
Bestiary #197 = (Chronodia with Lich)
Bestiary #198 = (Chronodia with Marilith)
Bestiary #199 = (Chronodia with Kraken)
Bestiary #200 = (Chronodia with Tiamat)
Bestiary #201 = (Lich and Marilith)
Bestiary #202 = (Kraken and Tiamat)
Bestiary #203 = (surrounded by all Four Fiends, Chaos and miscellaneous weapons)
Despite there being 8 different versions of Chronodia, the srategy is pretty much the same. Only her HP stats change in each of the fights minus the original version. It has a Atk of 130, where as versions 2-8 have 120. So we are just going to put this all in one single strategy below

 |
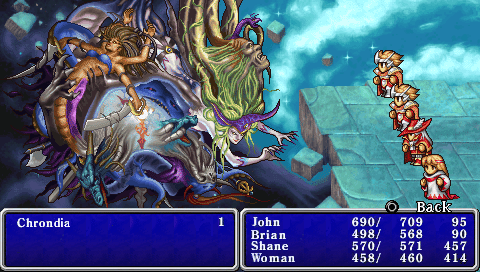
You need to run about a level 80+ to get through a scratch on Chronodia. Luckily you are gaining a lot of levels within the Labarynth. Trust me these extra levels will come in handy.
Chronodia is the roughest of all enemies in the game both old and new versions. She has a very nasty physical attack that can nearly wipe a full HP character out in one strike. She also has a Seal ability, which will seal a command for 4-5 minutes. (Similar to the trials in the labarynth) If your fight command is disabled, use spell casting items such as the Lightbringer and Judgment Staff. If you lose the Item command, spend time using Recovery equipment (Healing Staff/Helmets, and Rune Staves) to keep everyone alive through the lock out. Be sure above all others to keep your White Wizard alive.
And does she have magic you ask? Yeah she has magic...and then some. Here is a run down on her spells and other abilities:
Slow, Stop, Ink, Kill, Warp, Haste, Firaga, Thundaga, Blizzaga, Thunderbolt, Ice Storm, Poison Gas, Comet, and Flare. Worried yet? I am going to base this on my crew I used. (Two Knights, Red Wizard, and Black Wizard)
In the first round of battle, Have your first Knight use Giant's Gloves, the second use Rune Staff, Red Mage use hermes Sandals on the first Knight, while The White mage casts NulAll on herself. In the second round, have the first Knight use the Rune Staff, while the second repeats the actions of the first in the last round. The Red Wizard should use Hermes Sandals on the second Knight, While the White Mage hits the party with Invisera. Third Round (If you survive) Have the two Knights use the Gloves one more time each, while the Red and White Wizards heal. In this next round, have the Knights and Red Wizard heal, while the White Wizard hits the party with Protera. (Might consider using Protera and Invisera 2-3 times.)
And if you are still around, begin hitting her with your knights, while the two wizards begin endlessly healing with the Rune Staves. Don't bother with offensive magic, as it does little to no damage to Chronodia at all. Just keep everyone's health up. If your Knights are not hitting very hard, have each one (In different rounds) hit the Giant's Gloves, while the second Knight hits the other with another hermes Sandals. If someone gets knocked out, stop attacking, and serve as medics, while the White Wizard gets them back up. Place the enhancements back on them, and then continue. If the White Wizard gets dropped, get her back immediately.
This is going to be one tough challenge no matter what. Even the weakest version at level 80 is more difficult than all the other bosses in the game combine. But if you have enough patience, and do everything well, you will come out on top.
Each different version of Chronodia you beat will yield you a great reward. Here is what you will win, from the different versions. (They follow suit of the images on the left)
 Maximillian (Knight & Red Wizard armor) Maximillian (Knight & Red Wizard armor)
 Lust Dagger (Ninja & Black Wizard weapon) Lust Dagger (Ninja & Black Wizard weapon)
 Golden Staff (White Wizard weapon) Golden Staff (White Wizard weapon)
 Master Shield (Knight & Red Wizard shield) Master Shield (Knight & Red Wizard shield)
 Shadow Mask (Ninja helmet) Shadow Mask (Ninja helmet)
 Lordly Robe (White Wizard armor) Lordly Robe (White Wizard armor)
Survival Vest (Ninja & Master armor)
 Barbarian Sword (Knight & Red Wizard weapon) Barbarian Sword (Knight & Red Wizard weapon)
Congrats on a epic victory. Give yourself a pat on the back, and enjoy the fact that you have conquered Final Fantasy PSP! |
|


 2005-2020 Final Fantasy Kingdom, & I.M. Meckem Web Design.