 When you begin Soul of Rebirth, you will hear Minwu speaking about his passing, when he breaks the seal on the Ultima Tome. He will then awaken to find himself here. When you begin Soul of Rebirth, you will hear Minwu speaking about his passing, when he breaks the seal on the Ultima Tome. He will then awaken to find himself here.
Minwu is at the same level and equipped with the same stuff you had on him when he passed. (This is true for all but Scott in the section.) Equip anything that you might have better than his current stuff. If you have any good spells like Flare or Holy, be sure to give them to him.
Once you are ready to begin, head into the next area. |
Unknown Cave
In this first area, you will want to head to the bottom right off the bat. When you do, you will see somone being attacked
by Imperial Soldiers. Minwu initially believes it to be Gordon, but soon realizes it is Scott. When you approach, you will be taken into a fight with several soldiers.
After you defeat them, Scott and Minwu will have a brief conversation, and Scott will join the group. Set him up with the best equipment you might posses. He is more proficient with swords than anything else. If you have a Bloodsword, that is a great way to go.
Also don't be shy about giving Scott some spells like Cure, and Fire. Both of these will come in handy in later fights.
After the union, grab the Elixir in the chest near you. Then head over to the left, and enter the bottom most door to the next area.
 In all but one of the small rooms, you will find them to be empty. These are like the rooms in the main story, in they are filled with encounters every step. Though it is a great place to level up your characters, I would suggest waiting until you have gotten all of your characters. These are some difficult enemies, and could easily wipe the party of two out. In all but one of the small rooms, you will find them to be empty. These are like the rooms in the main story, in they are filled with encounters every step. Though it is a great place to level up your characters, I would suggest waiting until you have gotten all of your characters. These are some difficult enemies, and could easily wipe the party of two out.
In the second area, head to the top. There you will see another fallen companion, Josef. He is confronting his killer, Zombie Borghen. When you approach, you will be taken into your first boss fight of the dungeon:
 |
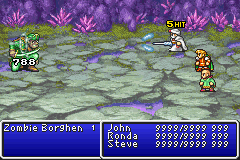 Your fight with Zombie Borghen will be the same as it was when you encountered him in the story. If you have any fire spells, use them. He cannot take the heat well at all. Your fight with Zombie Borghen will be the same as it was when you encountered him in the story. If you have any fire spells, use them. He cannot take the heat well at all.
Make sure also to keep everyone healed up during the fight as well. I would suggest making Minwu the constant healer, and have the other two attack. If you have a Bloodsword equipped, remove it.
Once you have defeated this dead head, Josef will join your party for good. |
With Borghen out of the way for good, grab the Thief's Gloves out of the chest, and continue on. To the left, you will find
a chest containing a Hellfire item, and to the south of that, there is a chest with an Ancient Sword.
Once you have obtained the sword, head all the way to the left, and up to the door at the top. This will take you into the next area.
In this area, head down through the waterfall. Remember that the falls will give your party 1 HP damage with every step. Grab the Silver Cuirass out of the chest, and give it to the party member with the weakest armor.
At the bottom of the falls, you will find the same magic merchant that was there in the main story. His spell inventory has changed, but not the high prices. If you can, I would suggest Flare and Holy for your offensive magic users, and Haste on a few of them as well.
Here is a list of the spells for sale, and their price:
Berserk 10,000
Haste 20,000
Holy 20,000
Flare 40,000
Once you have completed your shopping, head into the final door on the bottom.
There are two chests in this area, the one in the top left contains a Aura Tome, while the one in the center contains a Hi-Potion.
The door in the top area leads to the only room with treasure. (See below) It contains a Golden Shield, Demon Spear, and Eye Drops.
Be sure to get these, before continuing.
Once you have plundered the room, return to the main area, and head through the door on the left side of the area.
 This is the only room in the Unknown Caves that contain treasure. This is the only room in the Unknown Caves that contain treasure.
The Golden Shield is a great addition to your armor for just about anyone. You might find the spear a bit out of place, since you most likely have no one who has proficiency with one. Give that a bit of time, and you will get one.
As you go through this area, you will see a familiar enemy. When you go to fight it, someone will stop you. It is Ricard,
the last of the Dragoons. When he joins you, you will be taken into the second boss fight of this section with the Roundworm.
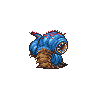 |
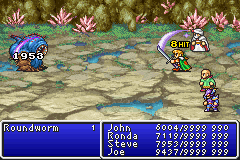 With the addition of Ricard to the party, this should be a pretty easy fight. Be sure to cast protective magic on your characters, to lessen the blows of Roundworm. With the addition of Ricard to the party, this should be a pretty easy fight. Be sure to cast protective magic on your characters, to lessen the blows of Roundworm.
If you have the Bloodsword, give it to Scott, and this fight will be over fast.
Keep everyone healed, and Roundy will eventually squashed flat. |
After defeating the Roundworm, grab the Ether out of the chest. Now just head to the end of the path, collecting the Protect
Ring and Hi-Potion on the way.
The final area in the Unknown Cave is just a straight shot from point A to point B. Head on through, and exit to your next
destination.
Machanon
| Spells |
Ah a bit of relief from the barrage of enemy encounters. When you get through the unknown Cave, you will end up in the town of Machanon. Here you can rest at the Inn, revive any fallen warriors, and get some much needed supplies.
A suggestion would be to first work on getting the top in the armor department for your crew. The Ice Shield, as well as the Knight's Armor are great additions, if you have not got anything better. (Though Diamond is tops here, if you have it.)
Once this is done, head out to any area, and fight around. This will not only get you more Gil to spend on weapons and supplies, but you will get some much needed exp. Try to get a few Elixirs, and a bunch of Ethers. There are a few fights ahead, that magic is key to victory.
As for weapons, you get just as good stuff in the Unknown Cave, as you do here. So it is up to you on if you should get the money for any weapon changes.
In the spell department, everyone
should get a Cure, and Life Tome. This is important, since you do not know if your main caster will ever get knocked out in a fight.
To round out the spells, make sure someone has Protect, and another has Shell. These will greatly help in your defenses. Also getting Fire, Blizzard, and Thunder will do nicely for the offensive spells.
When you are finally ready, you will notice there are two exits, other than the one you came in with. The one at the top of town will lead you to the Camber of the Soul. Here you can face a awesome beast for the Ultima Tome. This is a great spell to get, and I would highly suggest visiting there next.
If you choose not to go, the exit to the bottom right will take you into the Unknown Palace. |
| Name |
Cost |
| Basuna |
600 |
| Blink |
300 |
| Blizzard |
150 |
| Cure |
100 |
| Esuna |
600 |
| Fire |
150 |
| Life |
1000 |
| Mini |
2000 |
| Protect |
300 |
| Sap |
1000 |
| Shell |
300 |
| Thunder |
150 |
Weapons |
Armor |
Items |
| Name |
Cost |
Name |
Cost |
Name |
Cost |
| Axe |
100 |
Buckler |
50 |
Antidote |
30 |
| Bow |
20 |
Clothes |
20 |
Cross |
50 |
| Broadsword |
100 |
Giant's Gloves |
1500 |
Elixir |
50000 |
| Flame Lance |
15000 |
Giant's Helmet |
500 |
Ether |
1000 |
| Ice Bow |
5000 |
Ice Shield |
5000 |
Eye Drops |
40 |
| Javelin |
80 |
Knight's Armor |
5000 |
Gaia Drum |
3000 |
| Knife |
40 |
Leather Cap |
30 |
Gold Needle |
500 |
| Mythril Knife |
400 |
Leather Gloves |
30 |
Hi-Potion |
150 |
| Ogre Killer |
15000 |
Mythril Armor |
700 |
Maiden's Kiss |
500 |
| Power Staff |
8000 |
Mythril Gloves |
500 |
Mallet |
60 |
| Staff |
50 |
Mythril Helmet |
300 |
Phoenix Down |
500 |
| Wing Sword |
5000 |
Mythril Shield |
300 |
Potion |
30 |
Chamber of the Soul
 As you might have expected, this is a repeat of the Mysidian Tower. When you enter the first area, just head into the next room. You will see the same scenario that played, when Minwu lost his life. This time, however, he will prevail and remove the barrier to the next room. As you might have expected, this is a repeat of the Mysidian Tower. When you enter the first area, just head into the next room. You will see the same scenario that played, when Minwu lost his life. This time, however, he will prevail and remove the barrier to the next room.
when you enter the final room, you will see the same four orbs surrounding the center. These orbs will raise a stat you have by a point. Be sure to visit them before you continue to the center.
When you approach the center orb, the defender of the Ultima Tome will speak to you. You soon discover you are up against none other than Ultima Weapon.
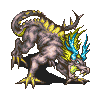 |
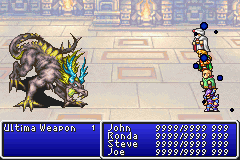 With a staggering 15,000 HP, Ultima Weapon will give you a run for your money. (What you thought you were going to get the spell just like that?!?) With a staggering 15,000 HP, Ultima Weapon will give you a run for your money. (What you thought you were going to get the spell just like that?!?)
He has a few nasty attacks, including Flare, and Holy. His physical strikes can be very devastating as well. The first order of business should be getting your party set up with Protect, Shell, and Haste if you have them. Then pick two characters as attackers, while the others focus on healing every turn.
I would strongly suggest either a magical approach to this battle, or the Bloodswords if you have any. If you can outlast this legendary foe, you will then get the Ultima Tome. |
Unknown Palace
The first three floors of the Unknown Palace are very straight forward, with a few chests to get on the way. There is a Ether in the second room, and Genji Gloves in the third room.
Also, like Pandemonium, there are hidden paths in the walls. These
are marked with black lines on the maps.
Go on through to the fourth room down on he page, and I will meet you there.
In the fourth room of the Unknown Palace, you will come to a set of four doors. If you want to just go straight through, then head through the second door to the left, and on through.
However, if you do this, you will miss out on some great items. These items are guarded by extremely powerful enemies, so make sure everyone is in good health, and has good use of their spells. You might want to spend a bit of time leveling their stats up a bit, before going into these fights.
The first door you want to go through is the right most door. This will take you to this room. When you enter on the right side, simply make your way up to the chest at the top. Here, you will find the Wyvern Lance for Ricard, but you are going to have to fight for it.
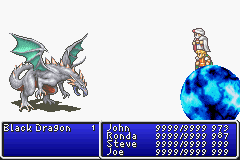 Black Dragons can be found in the Unknown Palace at random, but they are very rare. This is the toughest of the new enemies to the game. He has devastating physical attacks, as well as spells like Flare, to pound you into the dust. Black Dragons can be found in the Unknown Palace at random, but they are very rare. This is the toughest of the new enemies to the game. He has devastating physical attacks, as well as spells like Flare, to pound you into the dust.
It has a very high physical defense, which places a bit of strain on your fighters. That said, you can bombard it with magic successfully, due to its rather low magical defense. Be sure to keep everyone healthy at all times. I would suggest having a single player
concentrate on nothing but healing every round.
Once you have defeated this rather nasty enemy, you can then have the Wyvern Lance for your own. Give it to Ricard right away, as it is extremely powerful.
From here, make your way down through the first doorway, then follow the path down the stairs, then back up through the doorways. Once back at the top, head straight to the left, through the hidden paths. In the corner room, you can access a hidden room, if you enter on the bottom most tile. In this room, there is an enemy encounter every step. These encounters can be difficult when there are gangs of enemies. These enemies range from Bloodbones, to Golem types, to Mini Satana. Keep everyone healthy and alive, to get to the chest. When you open it, you will be attacked by one of the Palaces four bosses, Lucifer.
 |
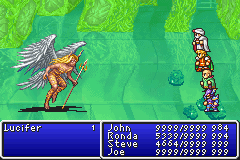 Lucifer is just flat out devastating, no matter what level you are on. His physical attacks can wipe you of 2000 HP, and heal him for the same amount. This is a fight, where curing your injured becomes a bit pointless. He will simply wipe them out. Just keep them alive, and fighting. Have somone cast Berserk on a main fighter, say Ricard, and let him go to town. Have your offensive magic person bombard him with Holy and Ultima. Lucifer is just flat out devastating, no matter what level you are on. His physical attacks can wipe you of 2000 HP, and heal him for the same amount. This is a fight, where curing your injured becomes a bit pointless. He will simply wipe them out. Just keep them alive, and fighting. Have somone cast Berserk on a main fighter, say Ricard, and let him go to town. Have your offensive magic person bombard him with Holy and Ultima.
When you defeat him, you will be able to take the Wild Rose. |
Once you have sent Lucifer back to the underworld, head back to the fourth room. There, if you are in good shape, head into
the next door to the left. This will lead you into the same room as before, but you will now be on the left side. Make your
way up to the first set of stairs. At the top of the right side, move through the hidden path, and enter the center doorway.
Here you will find a chest containing the Stardust Rod, and your next boss, Yamatano Orochi.
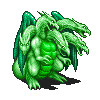 |
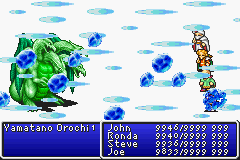 Yamatano is the reverse of Tiamat. But there is nothing to say that she is any easier! She has a Blaze attack, a Thunder attack, and a Blizzard attack that can easily whip you out of a few hundred HP. Her physical attacks are no laughing matter either! They can wipe a character with under 1200 HP out, if allowed. Yamatano is the reverse of Tiamat. But there is nothing to say that she is any easier! She has a Blaze attack, a Thunder attack, and a Blizzard attack that can easily whip you out of a few hundred HP. Her physical attacks are no laughing matter either! They can wipe a character with under 1200 HP out, if allowed.
You should begin the fight, by casting Protect and Shell. Then bombard him with non-elemental spells such as Flare, and Holy. He has a very high defense, thus only the Bloodsword will do any damage at all physically. As for magic, she absorbs all elemental spells thrown her way. Just keep pounding her with Ultima, Flare, and Holy. If you do have the Bloodsword, it will definitely make short work of the Chromatic dragoness. After her defeat, you will then be able to walk away with the Stardust Rod. A great weapon of choice
for those who wild the rods. |
After you get rid of that ugly monstrosity (who thought up the color for that one?) head back again to the room with the doors. This time, you will want to take the left most door. This will lead you into the room below. Once inside, head up the path
to the chest. Inside you will get a Ribbon, and a rude awakening from Steel Giant, your next boss.
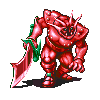 |
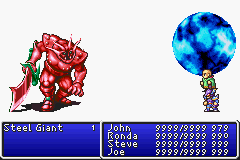 Iron Giants cousin is nothing to laugh at. His attacks are hard hitting, and his defense is absurd. If you have a few people with a higher level Thunder spell, whip them out now! His only weakness is lightning. If you do not, have someone boost an attacker with Berserk, and have them whittle his HP down a bit at a time. Have others prepared at all times to heal. He can whip you at once with a sword attack, leaving the entire party in a world of hurt. Iron Giants cousin is nothing to laugh at. His attacks are hard hitting, and his defense is absurd. If you have a few people with a higher level Thunder spell, whip them out now! His only weakness is lightning. If you do not, have someone boost an attacker with Berserk, and have them whittle his HP down a bit at a time. Have others prepared at all times to heal. He can whip you at once with a sword attack, leaving the entire party in a world of hurt.
when you defeat him, he will occasionally drop Genji armors, and or Excalibur. These are great boons to get on top of the Ribbon. |
After sending this abomination to the steel mill, head back to that room with the doors for the last time. Now enter the second door to the left. Here, you can go get the chest found in the center of the room. This is a great piece of armor for those
who do not wield weapons (hint hint), but if you think you can just walk away with the bracer's, think again. You will be stopped by the Palaces final boss, Beezlebub Soul.
 |
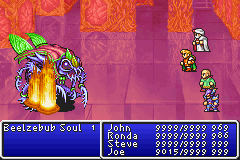 If anyone has played "Symphony of the Night" on the PS1, youi will know the name Beezlebub. This is an ugly disgusting creature, and its attacks are not nice either. He loves to use Scourge on your characters, poisoning them. Be sure to keep them healed during this fight. If anyone has played "Symphony of the Night" on the PS1, youi will know the name Beezlebub. This is an ugly disgusting creature, and its attacks are not nice either. He loves to use Scourge on your characters, poisoning them. Be sure to keep them healed during this fight.
He has an outstanding physical defense, that renders attacking him pointless as hell. His only weakness is fire, so use that to your advantage if you can. Have at least two people with higher level fire spells nail him, while the other two act as medics for healing. If you do not have any Fire spells, Flare, Holy, and Ultima make great substitutes. Do not use Thunder, as this will heal the boss. When you finally send him out with the trash for good, the Bracer's are yours. You might want to place them on the character who is not using weapons, as it does
wonders for them. |
After defeating Beezlebub Soul, head though the hidden path on the right side of that section, and down the far right side.
At the bottom, you will find the warp, which takes you back to the four door room, but this time in the unreachable section.
Head up the path, then left to the warp point that will finally take you out of this area.
The final rooms are all straight through rooms. In the first, you can find a Genji Helmet. In the second you will get Genji
armor in the top chest, and an Aegis Shield in the bottom chest.
The final two rooms have nothing of interest in them,
so head to the exit as fast as you can. Even in the Emperor's room, there is still enemy encounters, that drain your health
and magic.
Once you hit the Emperors room, he will begin a long dialog. He tells you that when he was destroyed the first time, he split.
There was the dark half, who became the ruler of Pandemonium, and then there is this one, which is the ruler of Arubboth.
He tells you the dark half has already been defeated in the living world.
In grand tradition of deceit, the Emperor explains
he has brought you there, so he can seek your forgiveness for your untimely deaths. If you agree, he will grant you eternal
life. At that point some very familiar people will come to aid you in seeing past the illusion. Now it is time to make him
pay for good.
 |
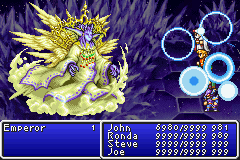 Be prepared for anything, because the Emperor can dish out just about anything. He hosts a massive amount of spells, including a devastating Flare and Holy. when he strikes you physically, the damage is severe, and he will regain some HP as well. Be prepared for anything, because the Emperor can dish out just about anything. He hosts a massive amount of spells, including a devastating Flare and Holy. when he strikes you physically, the damage is severe, and he will regain some HP as well.
To begin the battle, have somone cast Barrier, and Shell. On the entire party. This will reduce the damage received from the Emperor's bombardment of spells. You can't do much physically to attack, as his defense is absurdly high. But Ricard does a good deal more damage than the others. Set him up with Berserk, and cast Haste on everyone as soon as you can. Then hit him with Ricards attacks, and have the others become a supportive steps, with healing, and offensive magic. I say go with two healers, and one other for offensive spells. This will give you a boost in ability to keep up with the Emperor's onslaught.
Once again, if you have the Bloodsword, this will become a fast easy battle. This sword can easily take out 2,000-5,000 HP per successful strike.
When the Emperor finally falls, you will then be able to sigh in relief. You have now truly destroyed this vile man. Enjoy the ending, as you have deserved it. |
Once you defeat the Emperor, you will get basically the same ending as the main story, but there will be added things in there as well. Josef, Minwu, Ricard, and Scott will all now have their say as well on the world that is now free of the Emperor's evil dictation. Sit back, and enjoy the ending. And congratulations on defeating Final Fantasy II Advance!
|