|
Yang's Trial
Edward's Trial
Rydia's Trial
Cecil's Trial
Rosa's Trial
Edge's Trial
Kain's Trial
Cid's Trial
Palom and Parom's Trial
Brachioraidos
The Final Battle
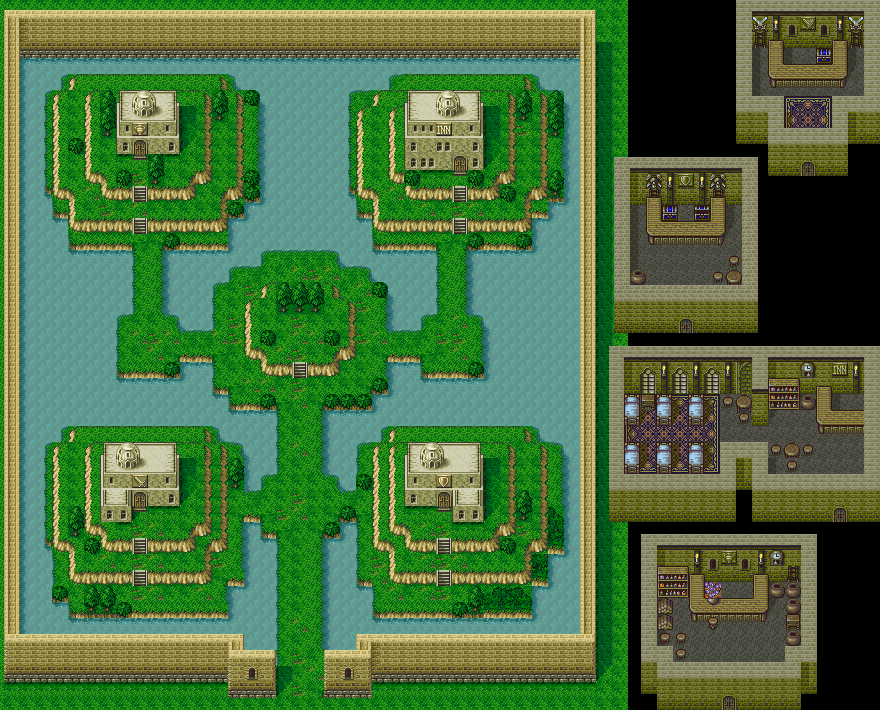
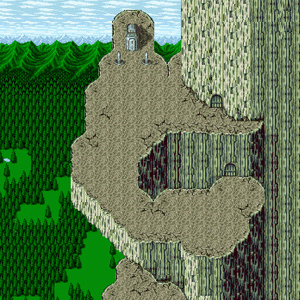
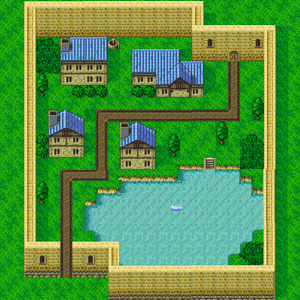
For a full size map, simply right click, and hit "View Image" on any map
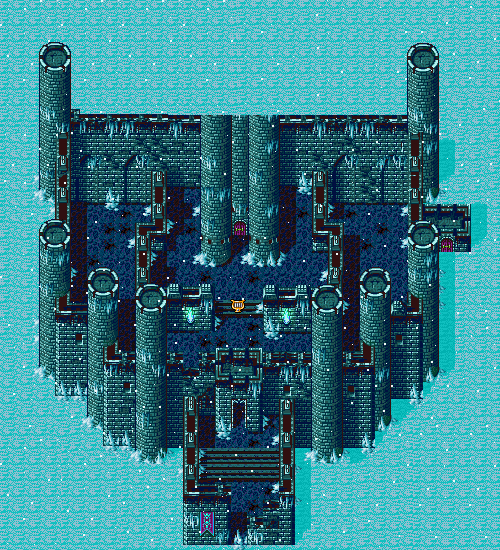
The Lunar Ruins are unlocked when you first complete the main story line. After the credits role, and you get to the "THE END" screen, hit the A button, and it will tell you that the Lunar Ruins are now unlocked. But only five of them have been unlocked. To fully complete the Lunar Ruins, you must defeat the main story with all the characters from the game. This includes the original 5 from the storyline, Palom, Porom, Yang, Edward, and Cid. My suggestion would be to complete the game with the original members first, and have them go through the trials. This allows not only their ability to level up, but the levels of the remaining characters match Cecil's. So if you have characters in the 70 level range, the remaining characters will become level 70 range.
There are several different types of floors inside the Lunar Ruins. They can be broken down into four categories: Standard
Floors, Remembrance Floors, Puzzle Floors, and the Trial Floors.
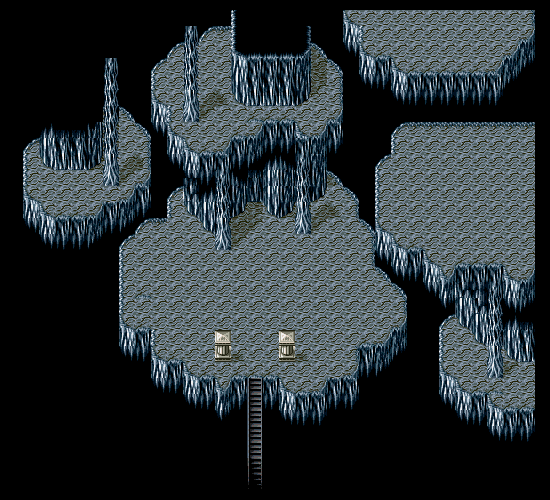
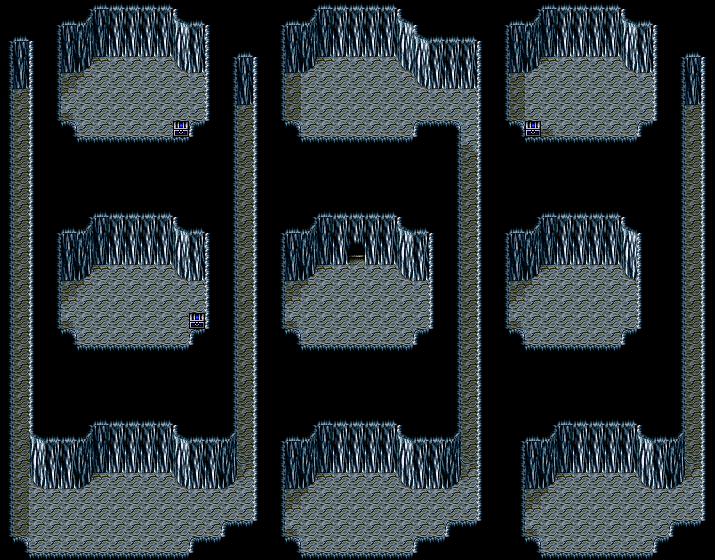
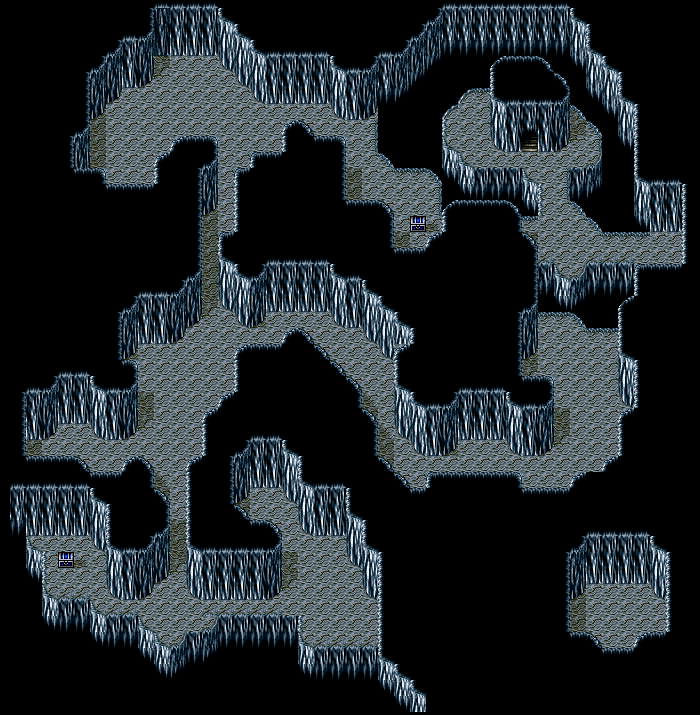
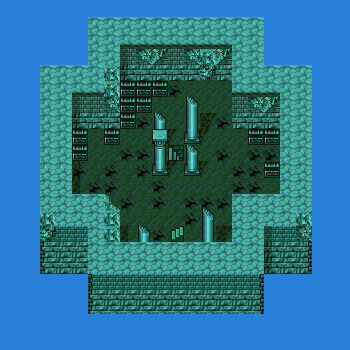
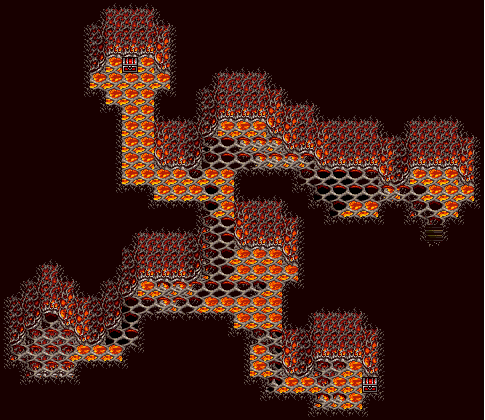
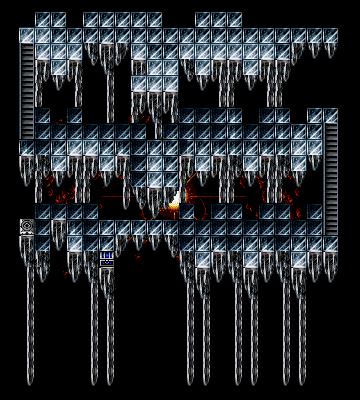
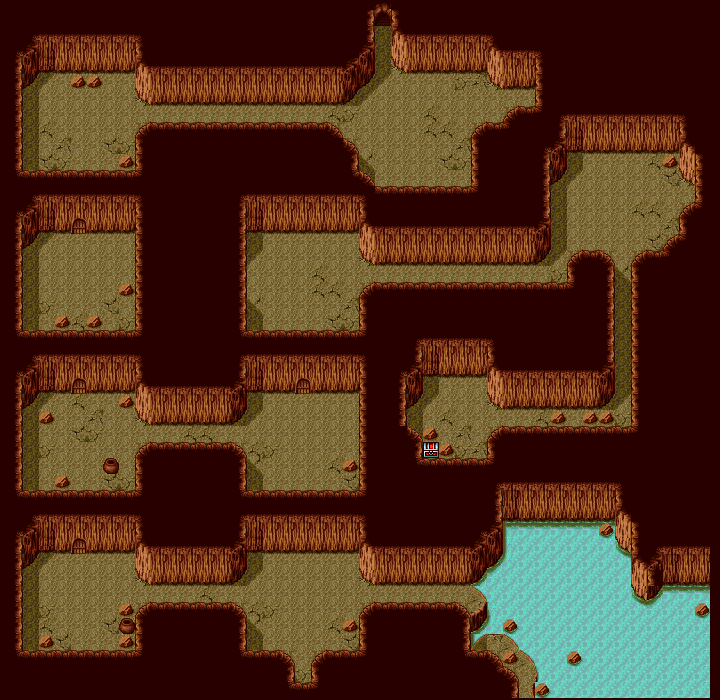
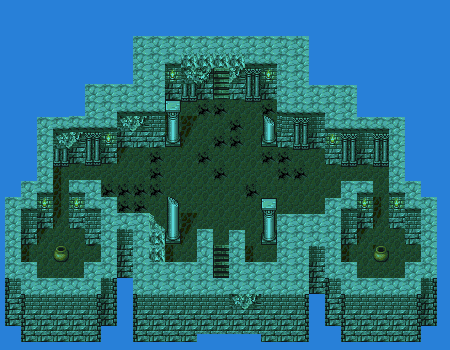
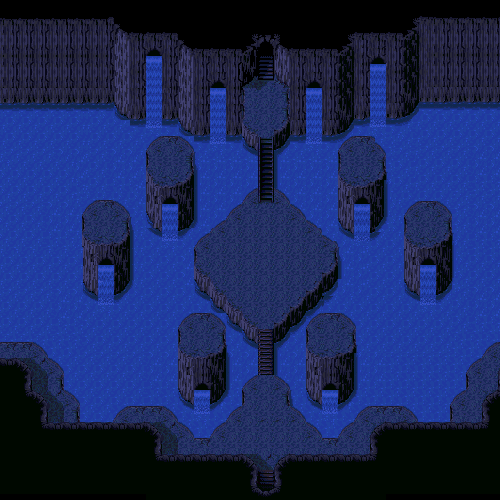
Standard floors are specifically found in the Lunar Ruins. These are floors that are unique to the area, and cannot be found
else ware. The majority of these are in the beginning, and look like the Lunar Sub terrain of the main story.
Remembrance Floors are floors from previous areas of the game. In these floors, the chests from before are in the same places, along with hidden areas. The contents of the chests though have changed.
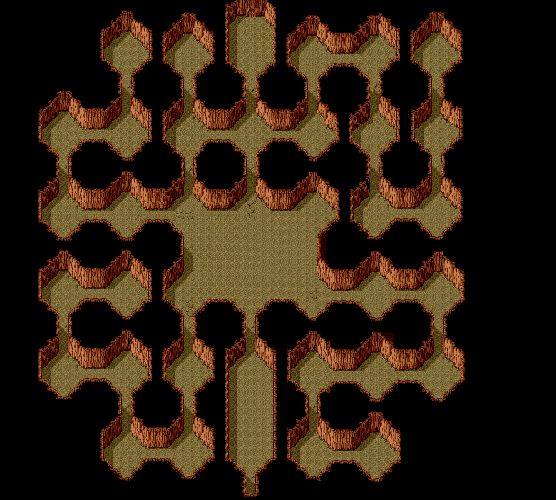
Puzzle Floors are areas where you have to complete a task, or solve a puzzle of some type in order to continue. None of these floors are real difficult, and even if you get a puzzle wrong, you should still be able to pass. Though there are a few exceptions to that.
Event Floors are actually the individual characters trials themselves. In these areas, a character must complete certain things to get through there trial. Each Event Floor has a final boss, and a reward for completion of the trial. Some of them though have specific things that must be done, in order to get the rewards. As long as you do not defeat the final boss of the ruins, after going through all the trials, you can enter them as often as you like. You must first leave the ruins, and return to do so.
It should also be noted, that a certain action in Kain's trial will cause you to be thrown out of it, with no possibility
of going back in. Make your choices in that one carefully.
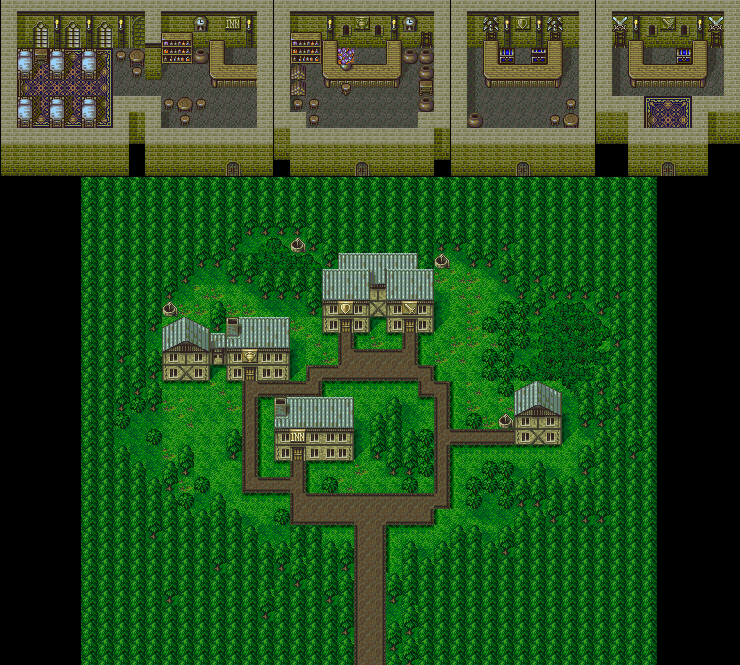
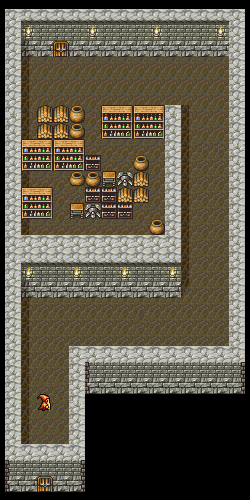
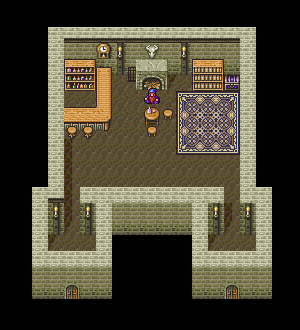
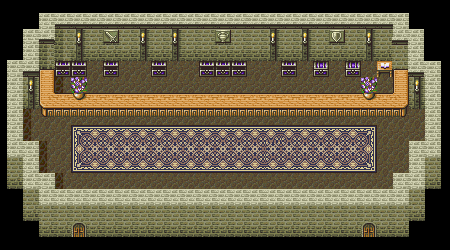
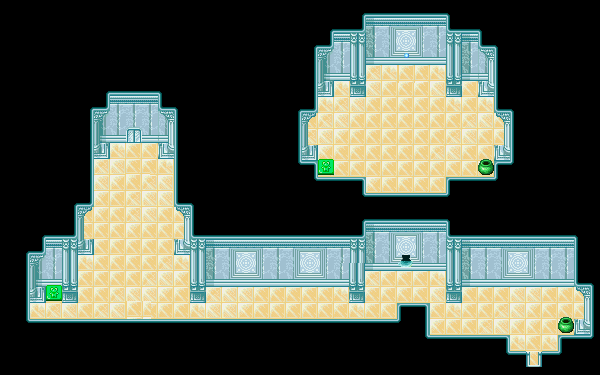
There is also two towns found in the Lunar Ruins. The first is located before Cecil's trial. Here is what is sold there:
 |
| Items |
Cost |
Weapons |
Cost |
Armor |
Cost |
Hi Potion
Phoenix Down
Remedy
Dry Ether
Elixir
Cottage
Bestiary
Gysahl
Whistle |
150
100
5000
50000
100000
500
980
20000 |
Shuriken
Fuma Shuriken
Yoici Arrow |
20000
50000
140 |
Aegis Shield
Light Robe
Gold Hairpin |
20000
30000
20000 |
There is also a second town before you reach Kain's trial, that has far more superior weapons, than some of the characters Ultimate Weapons! They are extremely pricey, so you might have to wait until you have gone through a couple of times. Here is what that town sells:
| Items |
Cost |
Weapons |
Cost |
Armor |
Cost |
Hi Potion
Phoenix Down
Remedy
Dry Ether
Elixir
Cottage
Gysahl
Whistle
Megalixir |
150
100
5000
50000
100000
500
20000
650000 |
Shuriken
Fuma Shuriken
Rising Sun
Assassin Dagger
Giant Axe
Tiger Fang
Pereus Arrow |
20000
50000
410000
420000
480000
450000
20000 |
Assassin Vest
Battle Gear
Maximilian
Chocobo Suit
Tabby Suit |
530000
500000
520000
550000
560000 |
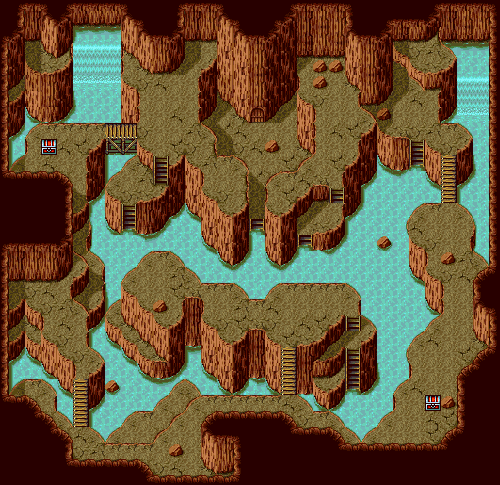
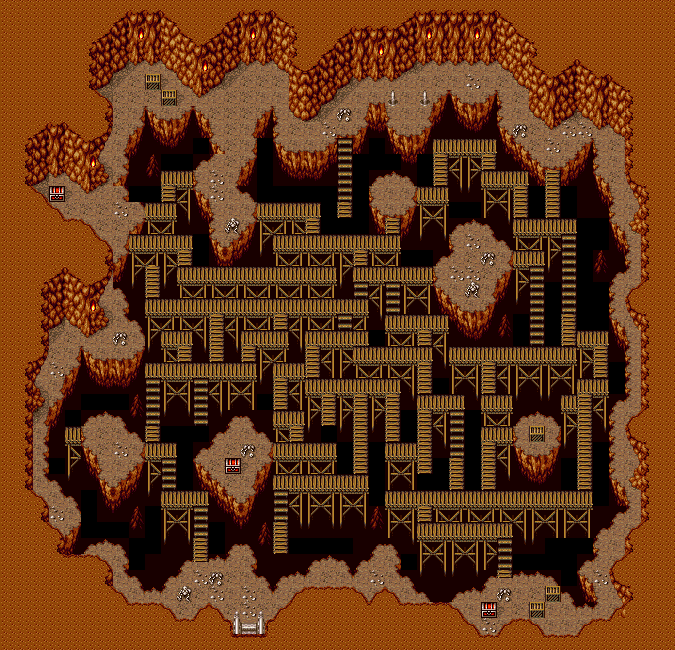
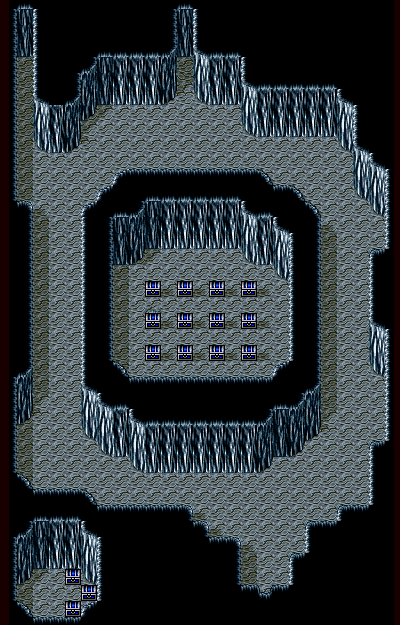
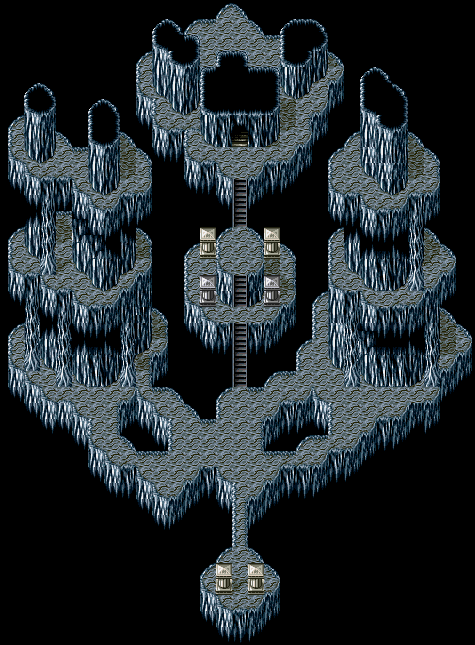
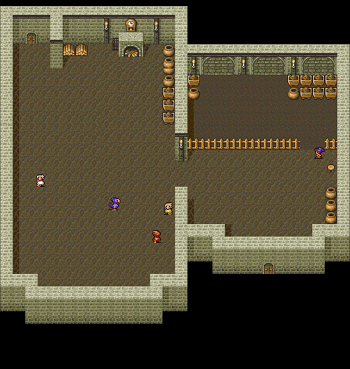
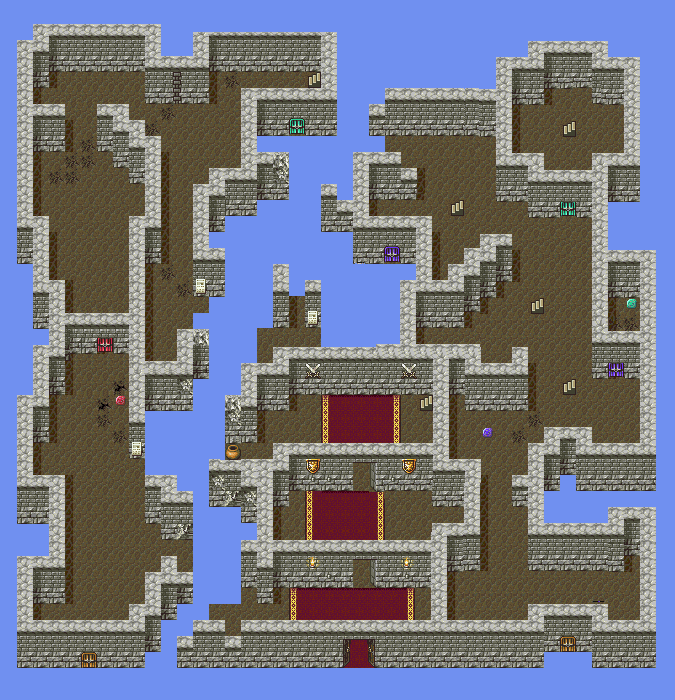
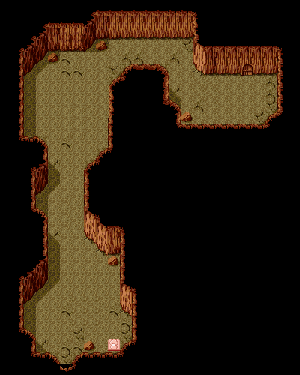
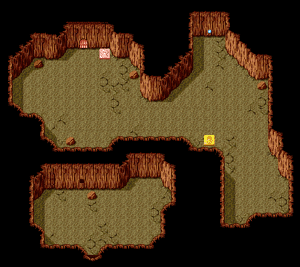
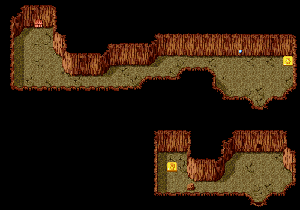
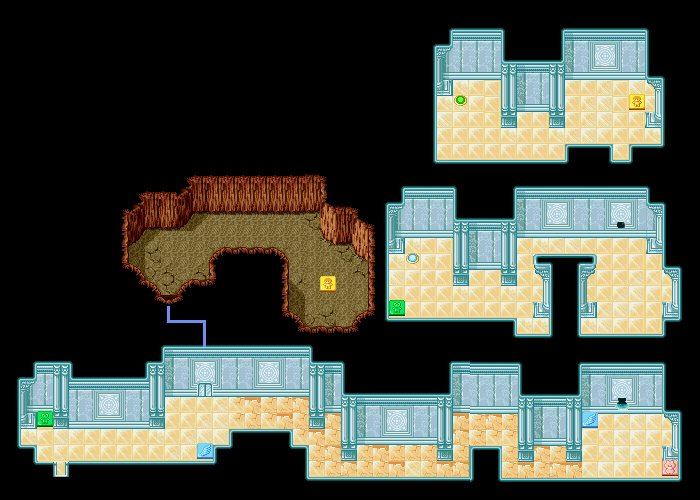
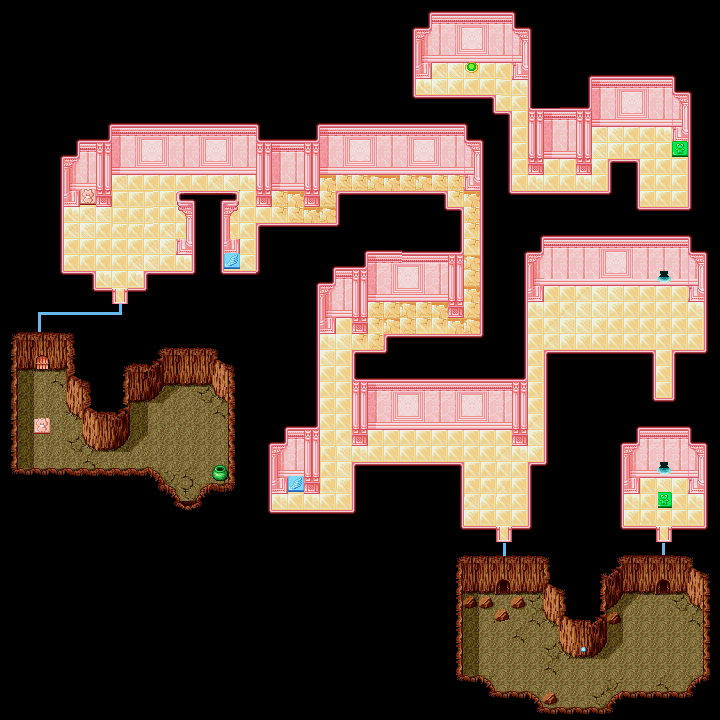
Below are the individual trials from the first to the last, as well as maps of each trial. Between each floor are randomly generated "in-between floors". These can be simple floors, rememberance floors (Floors from previous places in the game), or a puzzle floor. These require you to solve a small puzzle to move forward.
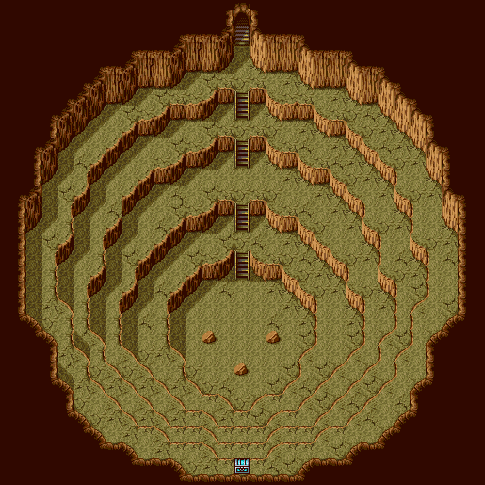
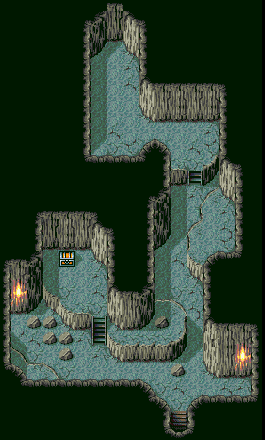
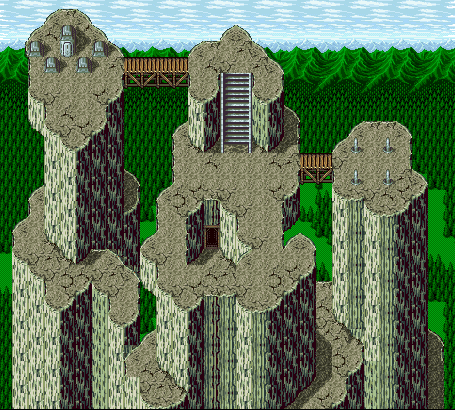
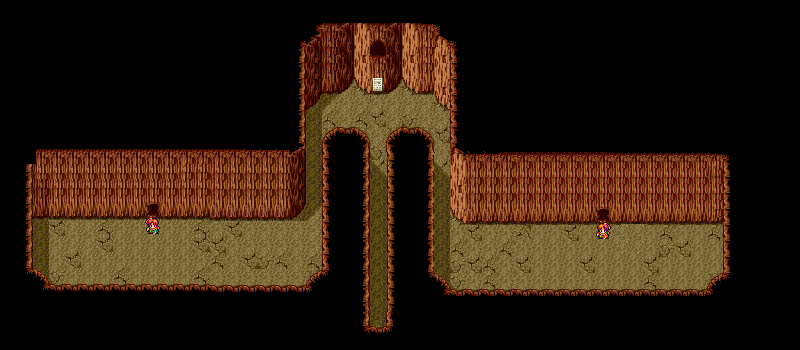
Though the floors are random, they only seem to appear between certain trial floors. So before each trial, I will place the floors found between. Of course, before every trial, there is a save floor like the two shown immediately below. The left is a save point, and the right side is a warp back to the Lunar surface. So let us begin our journey through the over 60 floors of the Lunar Ruins.
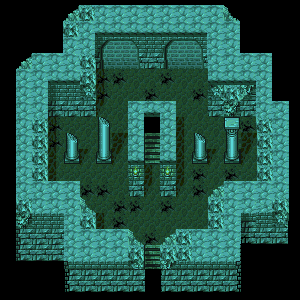
Beginning the journey through the ruins
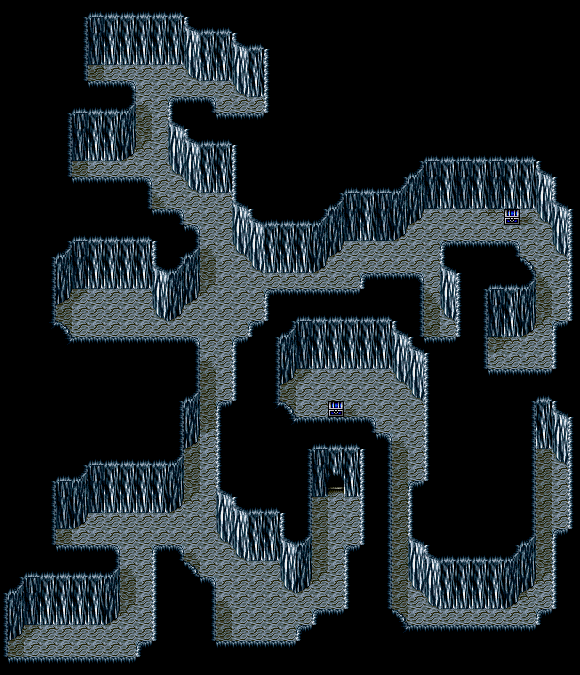
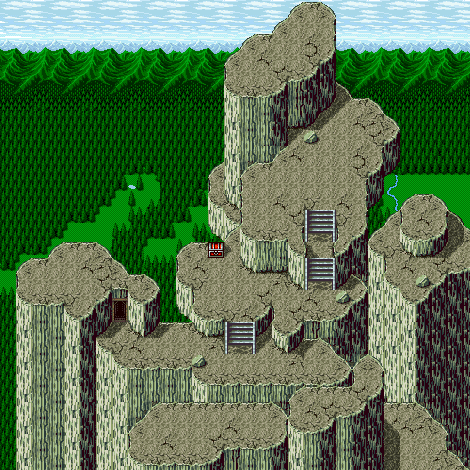
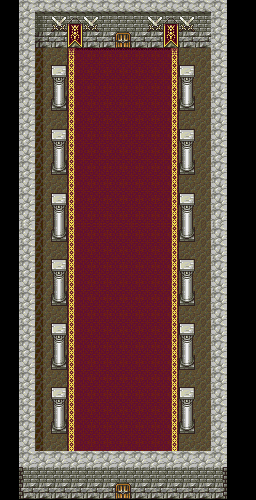
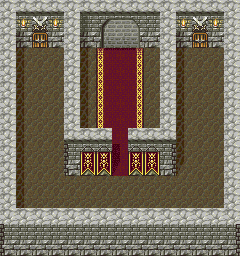
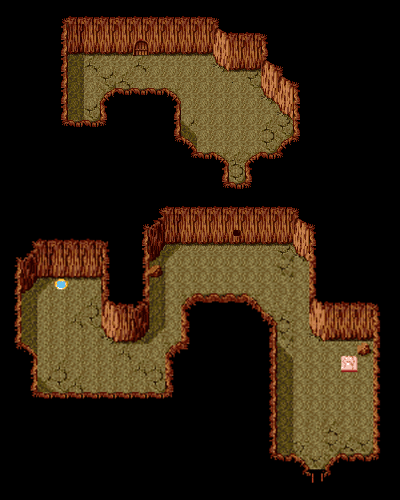
Yang's Trial
When you enter Yang's trial, a voice will tell you that they want to test you. Of the trials, this
is probably the most straight forward. You will enter six fights, as you progress down the corridor. The first two will be
with Soldier Monks, followed by Super Monks, and finally two fights with Drill Masters. Each fight is pretty easy. If you
have Rydia, have her cast either Meteor or Bahamut, to take care of the masses. If you have Palom, have him use Meteor. The
others should go with regular melee attacks, and healing. You can also use one of the Lunar items from the other trials to
end the fight in one shot. When you finally get through the hordes of monks, you will face Lunar Titan.
|
Rosa should cast Float as soon as she can do so. Actually, it would be better to do it before you engage Lunar Titan. This will hinder his earth attacks, and his ultimate attack. Just have everyone use physical attacks, Rydia summon Bahamut, or cast meteor, and Rosa should take up the role of medic. If you are not hurting any, have Rosa hit him with Holy. Do not think that because you are elevated, that Lunar Titan cannot hurt you. His regular
attacks can do some good damage as well. Be sure to keep everyone in good health, and he should fall after a time.
For winning the battle, you will get the Grimoire LT. |
When the dust settles, Yang will receive Discipline Gloves. This will change his "Power" command
into "Deadly", giving him triple his normal attack power. Quite a nice piece of armor for our friend Yang.
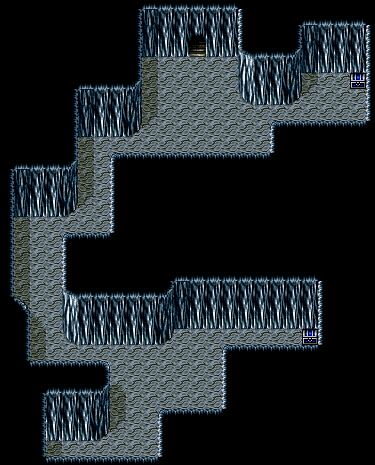
Edward's Trial
In Edwards trial, you will come upon a snowy version of his home. Within a couple of seconds you will hear a voice. You automatically move up, and find the Requiem Harp. You do not have to, but for fun equip it. Very shortly after a blue flame will attack you. These enemy spirits cannot be killed by conventional means. Have Edward sing, and after the initial song, Requiem will be played, and only then will the enemy be defeated.
 |
 |
Your objective is clear now. You must go through the entire castle and clear out the spirits inside.
Once you reach the top of the castle, return to the previous floors, and you will find a lone flame. After defeating it, you
will be taken to the castles sub terrain.
The sub terrain might seem a bit confusing, but it is actually pretty easy to navigate. Go through this area, and eliminate the spirits in here.
There are several hidden paths as well, that go between the different walkways. When you are finished, head into the next
area, and prepare for your boss fight.
 |
Lunar Shiva is not too difficult to face. Just have all your attackers fight, Rydia cast either Firaga, or Flare, and Rosa alternate between healing, and Holy. If you have passed Cid's trial, and have him in the party, his Fiery Hammer will work well, as will Cecil, Yang, and Kain's fire based weapons. Keep it on her, and the fight will not last long. Her most powerful attack does only about 1500-2000 damage. Your party should breeze through this fight.
For defeating the Ice goddess, you will get the Grimoire LS. |
After the fight, you will get Edwards Harmonious Ring. This ring will change Edwards Sing into Chant. When used, it casts Shell and Protect on the entire party. Finally Edward is getting to be a little more useful in battle!
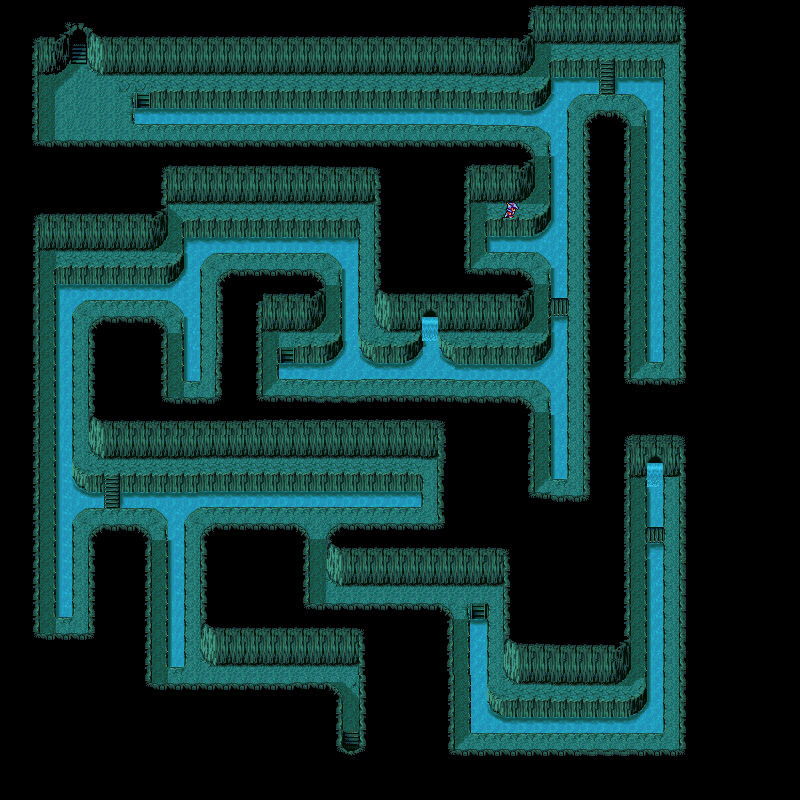
Rydia's Trial
When you first enter this area, Rydia steps ahead, and begins to get a bit weak. Suddenly, her summons leave her, and she turns into her younger self. She is now able to cast a limited number of White magic spells, along with her Black magic, and the remainder of her summons. Your quest is to get the summons back, that left her. The bottom left side leads to Ifrit, and the bottom right leads to Shiva. On the top left is Titan, and the right is Ramuh. Once you complete
the task of getting your summons back, head into the mist found in the center of the top area. Here you will face the boss
of this area..the Lunar Dragon.
 |
The Lunar Dragon is pretty standard for the Lunar bosses. Just have Edge, Kain, and Cecil nail it with melee attacks, while Rydia hits it with Meteor, Flare, or Bahamut. Believe it or not her own Mist Dragon
actually does a significant amount of damage. Combine that with Rosa casting Holy, when she's not healing, and Dragon will
fall in short order. You will get the Grimoire LD for winning the battle. |
After Rydia returns to normal, you will see something glittering ahead of you. This is A Mist Ring for Rydia. It increases her summons power. Claim your new prize, and head outside.
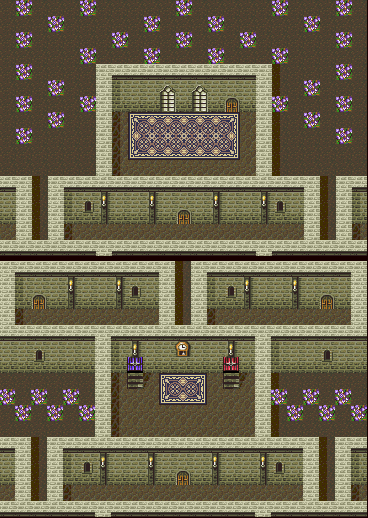
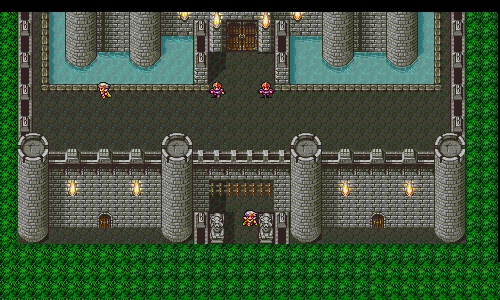
Cecil's Trial
  Cecil has a more interesting trial than most others. Rather than fighting hordes of enemies, or losing some of your abilities, Cecil's actions determine his fate here. A voice will tell you, when you enter the first room, that it wants to see if you are worthy of facing him. Worthy??? I know what does that have to do with anything? well, you are a paladin right? Are they not the honorable, humble honest types? well, your objective in this trial, is to stay on the path of righteousness. Everything you do in Cecil's trial will affect what happens in the end of the area. Choose what you do wisely.
In this first room, there is nothing really to do. Just simply go up and out the door to the next area.
It should be noted right now, that the rooms in this area are random. Just go with what ever room is next in line. Also there are 13 possible mini trials for Cecil, but he will only have to go through 5. Each room is in this section, to help you out. |
 This area has an old man, who seems to have lost a Golden Apple. If you speak to him, he will ask you to return it to him.
Simply go into the little storage looking area, and look on the far right side. You will notice a little glitter of light.
This is the Golden Apple. You can now take it back, or keep it for yourself. If you are a descent Paladin, you will return
it to the old man. This area has an old man, who seems to have lost a Golden Apple. If you speak to him, he will ask you to return it to him.
Simply go into the little storage looking area, and look on the far right side. You will notice a little glitter of light.
This is the Golden Apple. You can now take it back, or keep it for yourself. If you are a descent Paladin, you will return
it to the old man. |
 In this area, you will hear a bit of commotion, then the captain of the guard will come out and ask if you will assist in getting rid of the enemies overrunning them. There are three enemies to fight, all of which are Giant Warriors. When you have vanquished the three, speak with the captain. He thanks you for your efforts, and you are free to leave. In this area, you will hear a bit of commotion, then the captain of the guard will come out and ask if you will assist in getting rid of the enemies overrunning them. There are three enemies to fight, all of which are Giant Warriors. When you have vanquished the three, speak with the captain. He thanks you for your efforts, and you are free to leave. |
 In this section, you are greeted by an old man, who would like to tell you a story. He takes you up by the fire, and tells you he cannot believe that he has the Golden Frying Pan. He just has it in his chest, and it is unlocked. He soon falls asleep. At this time, you should leave. If you wish to test fate, and open the chest, you will be stopped by the old man, who says he was pretending to be asleep to test you. He will then tell you to leave, and force you into the next room. In this section, you are greeted by an old man, who would like to tell you a story. He takes you up by the fire, and tells you he cannot believe that he has the Golden Frying Pan. He just has it in his chest, and it is unlocked. He soon falls asleep. At this time, you should leave. If you wish to test fate, and open the chest, you will be stopped by the old man, who says he was pretending to be asleep to test you. He will then tell you to leave, and force you into the next room. |
 In this area, you will see an old man go over to the small tower. He pauses, and says something, and places an Elixir on the ground. He then walks back out the door. You should be assuming that this is a grave of some type. And is grave robing something that a Paladin would do? NO! Leave the Elixir, and head into the next area. In this area, you will see an old man go over to the small tower. He pauses, and says something, and places an Elixir on the ground. He then walks back out the door. You should be assuming that this is a grave of some type. And is grave robing something that a Paladin would do? NO! Leave the Elixir, and head into the next area. |
 In this area, walk up to the guards, and they will ask you to do them a favor. The guard on the lefts wife is about to have a baby, and he wants to be there for it. He is wanting you to take his place long enough for him to be there. The other guard worries that he might get caught, but the other says as long as he remembers the rules of no speaking, no moving, no one will notice. Agree with him, and put the controller down. Seriously, you cannot move. And there will be a Chocobo dropping an item, and a boy being chased by a bomb to try to make you move. But if you do, you will blow the trial. When the guard returns he exclaims that his wife had a son, and thanks you for helping him out. When you are done, head into the next area. In this area, walk up to the guards, and they will ask you to do them a favor. The guard on the lefts wife is about to have a baby, and he wants to be there for it. He is wanting you to take his place long enough for him to be there. The other guard worries that he might get caught, but the other says as long as he remembers the rules of no speaking, no moving, no one will notice. Agree with him, and put the controller down. Seriously, you cannot move. And there will be a Chocobo dropping an item, and a boy being chased by a bomb to try to make you move. But if you do, you will blow the trial. When the guard returns he exclaims that his wife had a son, and thanks you for helping him out. When you are done, head into the next area. |
 Here you will find yourself in something of a town. You will see four kids picking on a piggy, in the northern end of the town. Walk up to the lone bully blocking the path, and he will scurry off. Now head over to the group, and talk to the bully at the top. the four of them will run off. Now talk to the piggy, and he will thank you for saving him. There is nothing more to do here, so go on into the next area. Here you will find yourself in something of a town. You will see four kids picking on a piggy, in the northern end of the town. Walk up to the lone bully blocking the path, and he will scurry off. Now head over to the group, and talk to the bully at the top. the four of them will run off. Now talk to the piggy, and he will thank you for saving him. There is nothing more to do here, so go on into the next area. |
 When you enter this room, you will notice a guy running around the open chests in the other side of the room. He exclaims how easy it was to rob the place, and is ecstatic, until he sees you. He asks you to keep quiet about it, and you are given the option to ether keep his secret, or not to. If you are a good Paladin you will turn him in. Doing so gets you into a fight with a Bandit. This is not a difficult fight at all. When you defeat him, head out the door to the left, to the next area. When you enter this room, you will notice a guy running around the open chests in the other side of the room. He exclaims how easy it was to rob the place, and is ecstatic, until he sees you. He asks you to keep quiet about it, and you are given the option to ether keep his secret, or not to. If you are a good Paladin you will turn him in. Doing so gets you into a fight with a Bandit. This is not a difficult fight at all. When you defeat him, head out the door to the left, to the next area. |
 This town looks vacant at first, and you might be tempted to just pass on through. However if you look closely at the water, you will notice movement. Go investigate it, and you will find that you have just saved a kid from drowning. Are we not the hero or what? This town looks vacant at first, and you might be tempted to just pass on through. However if you look closely at the water, you will notice movement. Go investigate it, and you will find that you have just saved a kid from drowning. Are we not the hero or what? |
 When you go into the next area, you will find that your path is blocked by a creature of some type. Your only way through is to initiate combat. But if you just go in swords and spells a blazing, you will have made a mistake. Wait a few seconds, and your enemy will begin to talk to you. When you go into the next area, you will find that your path is blocked by a creature of some type. Your only way through is to initiate combat. But if you just go in swords and spells a blazing, you will have made a mistake. Wait a few seconds, and your enemy will begin to talk to you.
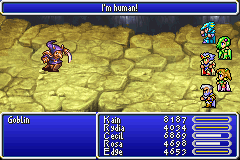
This enemy will tell you that he was once human, and that he is telling the truth. Well, he has not attacked you yet...maybe you can give him a chance. Keep defending, or healing if you need it, and eventually the fight will end. When it does, you will find a soldier in the place of the enemy
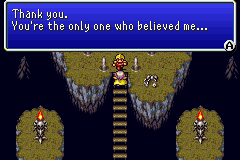
He will thank you for not defeating him, and tell you that you were the only ones who believed he was not the enemy. He will then move on, allowing you to go into the next area. |
 Here you will find a completely empty room. Cecil will then notice a vase in the top center of the room. Go up and inspect it. When you do, it will crumble, and a old man will come running in. He will ask if you are responsible for the vase being destroyed. If you lie and say no, he will know it was you, and shove you out of the room. If you are honest and say yes, he will just simply say things happen. (A note here...Paladin's are honest people) Here you will find a completely empty room. Cecil will then notice a vase in the top center of the room. Go up and inspect it. When you do, it will crumble, and a old man will come running in. He will ask if you are responsible for the vase being destroyed. If you lie and say no, he will know it was you, and shove you out of the room. If you are honest and say yes, he will just simply say things happen. (A note here...Paladin's are honest people) |
 In this section, you will find a little girl near the empty pen. She will ask you to round up her loose Chocobo's for her. When you get all the Chocobo's back into the stable, return to the girl for her gratitude. In this section, you will find a little girl near the empty pen. She will ask you to round up her loose Chocobo's for her. When you get all the Chocobo's back into the stable, return to the girl for her gratitude. |
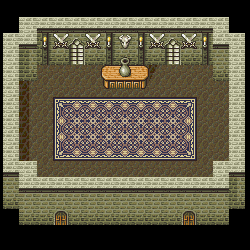
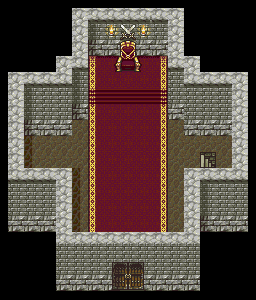
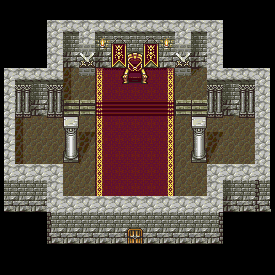 Here in the throne room, you will face your boss, Lunar Odin. Here in the throne room, you will face your boss, Lunar Odin.
Before the battle begins, if you accomplished all your tests correctly, he will tell you to take a sword from the chest that appears behind you. Depending on how many trials you passed, you will get one of five possible items.
0 passed- Scrap Metal
1 passed- Dark Blade
2 passed- Shadow Blade
3 passed- Caliburn Sword
4 passed- Flandango Sword
5 passed- Lightbringer Sword ( Megalixir, or Light Curtain, if you passed already)
The Lightbringer is the most powerful sword in the game, and it has the ability to randomly cast Holy. Now equip it, and
face Odin again. |
 |
He can use his Zantetsuken as the original Odin did, but does not use it very often. This is his only real threatening attack, so just pound away at him. Have Rydia cast Flare, or Bahamut, Rosa alternate between healing, and using Holy, and the others attack. Odin will not last long, especially against his recent gift to Cecil. For winning, you will get the Grimoire LO. |
When the battle is over, you will be taken back out of the trial. Save, and head to the next destination.
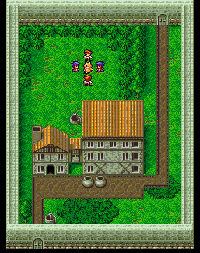
Rosa's Trial
When you first enter Rosa's trial, it almost seems like a normal town. Then, without warning, the
skies turn red, and Asura appears. She talks of how little moral values humans have, and begins to turn people into toads,
pigs, stone, or hurt them with thunder magic. She then crashes through the wall in the back of town.
When control goes back to you, head over to the man lying on the ground. Talk to him, and Rosa will cast Cure. He thanks you, and explains that everything has happened so fast they could not take cover. Asura sees your deed, and decides she is going to see if you have it in you to heal everyone. And this is the objective of Rosa's trial. You are to heal as many as you can, before time is up. But Asura is not without a bit of deviousness herself. Not everyone can be healed. Some of the townsfolk initiate battle when you try to heal them. Here are the ones to look out for:
The pig above the house in the beginning area.
The woman turned to stone, standing by the building.
The midget by the other stone woman, by the river.
The toad above the midget mentioned above.
When you get all the people in town healed, or you run out of time, you will be taken into battle with the boss of this area...Lunar Asura.
 |
As with the original Asura battle, you will want to cast Reflect on her, to make use of her curative magic. But unlike the original fight, she can now attack without being hit first. Just keep everyone in good health at all times, and attack regularly. If things get dire, do not be afraid to use a Megalixir or two.
After you take her highness from her throne, you will get the Grimoire LA. |
After the battle, and only if you saved all the townsfolk, you will get White Gloves for Rosa. This changes her Pray command into Miracle. When used, it always connects for higher healing. Also on occasion, it will cast Esuna on the entire party before healing them. It is definitely something you will want on Rosa immediately.
But if you do not save all of the townsfolk, you will still get a reward of some sort. Here is what you will get:
00-01 saved= nothing
02-04 saved= X-Potion
05-07 saved= Dry Ether
08-10 saved= Elixir
11-12 saved= Megalixir
all 14= White Ring
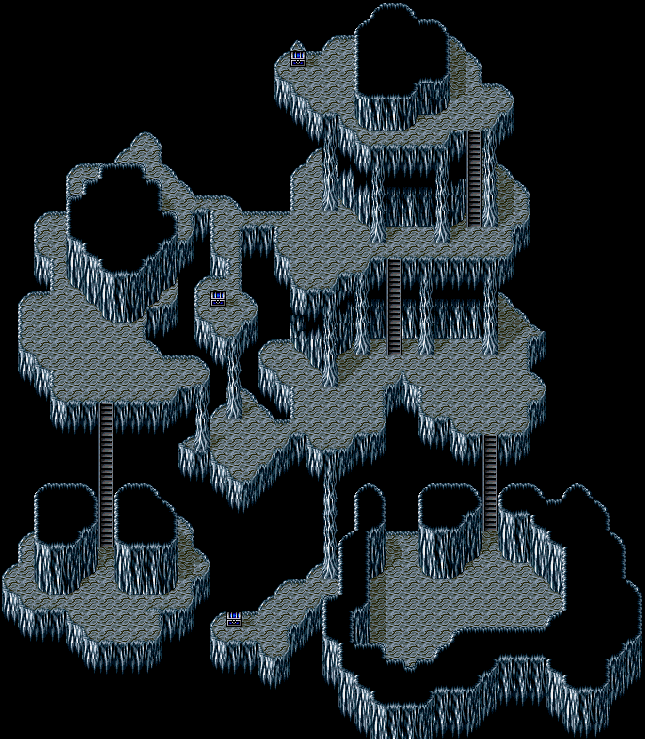
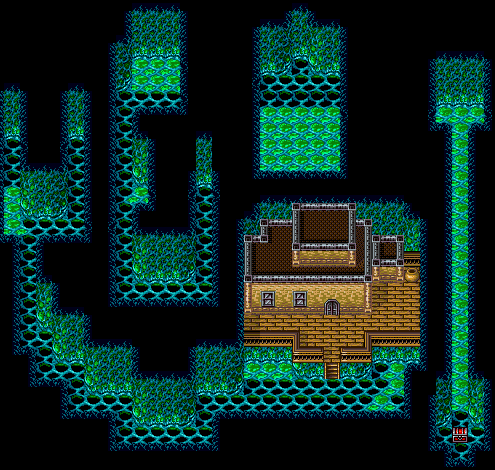
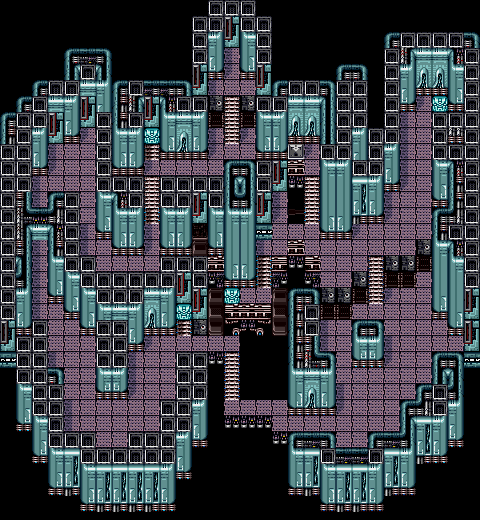
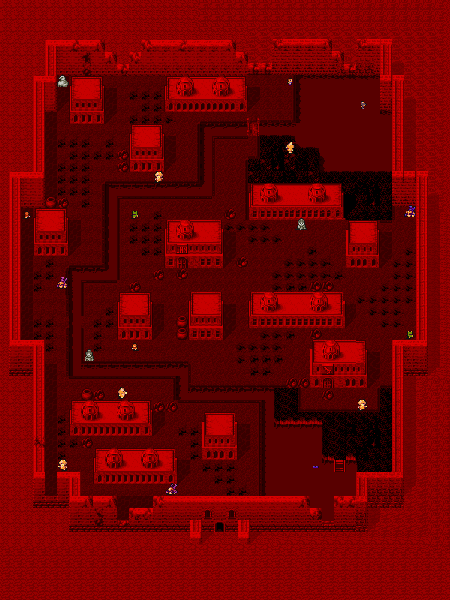
Edge's Trial
 |
 |
 |
 |
Edge has one heck of a trial here. You find yourself in a castle, that looks like something M.C. Esher came up with. Edge seems utterly delighted at the "Playground for ninjas", and wants to explore a bit. Be for warned, this trial can be a major pain in the rear end.
When the scene between Edge and Cecil is over, go after him. This will take you to map 2. Go up through the doorway, and enter the door on the left. You will then end up on map 1. Here, you have two buttons to press. One is offset the torch on the left, and the right is directly under the torch. If you press the offset one, you will get into a fight with a Palace Guard. Though you should be trying to get through this labyrinth, it should be noted that Palace Guards drop keys. You will need at least 5 of these little things to get everywhere in Edges trail.
Hitting the switch under the torch opens a door to the next room. In this room, there are 3 switches. The one under the shield is the one you want to hit. This will let you into the next room. To your left is an MP pot. Use it if you need to, and head up the stairs. This will place you on map 3, where the fire is. In this first visit, the flames are not there. Just head up the stairs, to the throne room. Here you will meet the king of this er castle. Edge will exchange pleasantries, and he will drop you back to map 2, where the switches are. Return from there to the room before the throne room. Now you will see flames blocking your path. Examine the weakened wall, and Edge will break through it. However you will fall.
You will land on the same map, but on the left side near the red switch. Go over the less broken hole, and hit the switch. This opens the red door ahead of you. Now go through the door, up, around, and down to the paper on the wall. Read it, and it will say down 1, right 2, down 2, right 1. So from that piece of paper, follow those instructions, and you will end up next to the paper to your right. Read this one, and it will tell you right 3, up 4, left 4, up 8, right 5. This will take you past a green door, and over to the right side of this map. Here, head to the blue switch, and hit it. then go south all the way, and head out the door. Now that you are in a different area, turn around, and head back in. This resets the floor holes, and you can cross back to the blue door. Enter it, and hit the green switch. Now you have no choice here, but to fall through the floor. This will land you in a area, that looks similar to the Cave of Summons. Remember that lava floors hurt you, so cast Float on everyone. There is some treasure in here, so you might want to explore. When you are done, find a teleporter, and head out. Find your way back to where you hit the green switch. Go through the green door in the top, right corner, and head up the stairs.
This will finally land you in map 3's new areas. Head down from the stairs, and through the secret path to the hall below you. Now find the next secret path, and head for the concealed door, in the center of the walled area. Instead of going to the door, find your way to the zigzag hall to the left. Go through the hall, and find the next secret path. Here you have a choice of continuing, or getting some keys, by hitting the switch above the path. You will need at least 2 more keys to get to the end. Or a total of 5 more to get to every place in the castle. From there, go down a little, and follow the path out across the sky to the door. Use a key, and enter it. This hidden path will take you to the Left edge of the middle section, past the two pillars. From there go all the way up, to the top of the throne room. Cross through the hidden hole in the wall, unlock the next door, and head through the hidden path to the left. When you get out of the path, head for the center top wall, and head through the hidden path back to the throne room. When you get there, speak again to the king, and get ready for your boss fight.
 |
This is not too difficult of a fight. Lunar Ifrit has a lot of fire based attacks, as well as some regular ones. Hit him hard with Blizzaga, and Holy, and just have your physical attackers pound away at him. Remember to equip any Ice based weapons you might still have in your inventory to give an extra boost in damage. Have Rosa heal when needed, and Ifrit will fall pretty fast. After the Fire has been put out, you will get the Grimoire LI. |
After the fight, examine the throne and you will find Hanzo Gloves for Edge. These glove turn Edges Steal command into Plunder. Though the success rate is only slightly higher than steal, you will do damage to the enemy when you steal. Also you will take more damage when detected by the enemy.
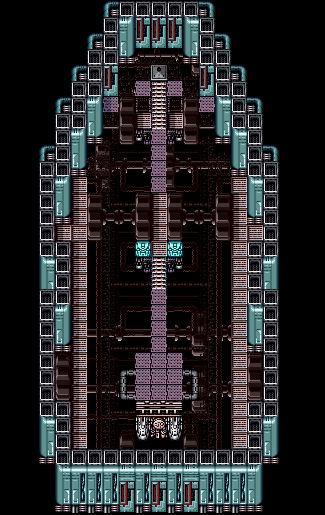
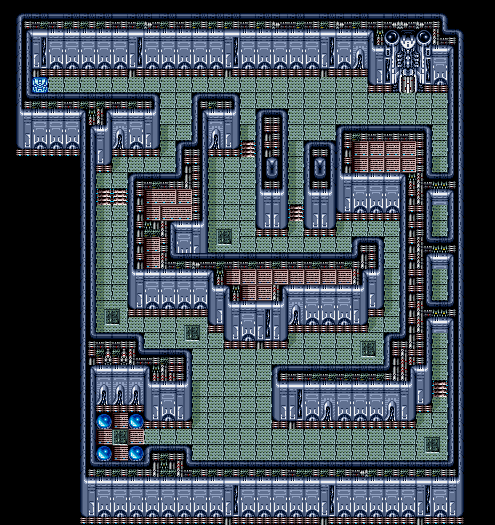
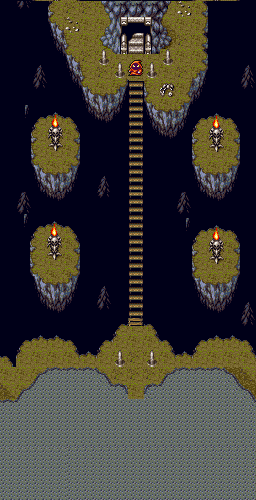
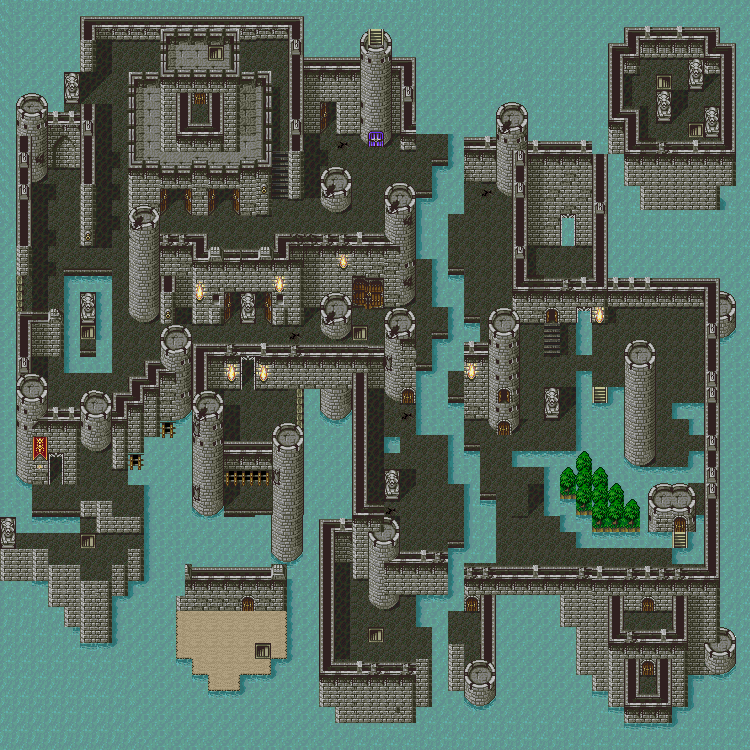
Kain's Trial
 When you try to enter Kain's trial, you will be thrown back. You discover, that only Kain can enter. He will leave the crew, and go in. Everything will go black, and Kain will wake to find himself in the town of Baron with Cecil and Rosa. You find there was an attack on Kain, and a robbery. Talk to everyone in the city, and then talk to the soldier that is standing by Cecil. The Captain of the guard will come and ask for Cecil, Rosa, and Kain to assist in catching the criminal. Afterwards, turn in for the day at the inn. When you try to enter Kain's trial, you will be thrown back. You discover, that only Kain can enter. He will leave the crew, and go in. Everything will go black, and Kain will wake to find himself in the town of Baron with Cecil and Rosa. You find there was an attack on Kain, and a robbery. Talk to everyone in the city, and then talk to the soldier that is standing by Cecil. The Captain of the guard will come and ask for Cecil, Rosa, and Kain to assist in catching the criminal. Afterwards, turn in for the day at the inn.
Day 2
You will awaken to find a strange lance by your bed. When you grab it, it will say you found a blood-soaked lance. Go outside, and you will find that the Weapons Vendor has been murdered. Talk again to everyone, and then talk to the soldier near the vendor. You will hand over the lance to him. There is nothing more to do, so turn in for the night.
Day 3
On the third day, head outside, and watch the events take place. You will find that Rosa is missing. Now go into the building, that should go to the Serpent's Road. Head down the stairs, and talk to everyone in the room. Once you are finished go to the inn, and turn in. Cecil will decide to go rest with you, and heads into the inn with you.
That night, you'll awaken to find Cecil gone. Head outside, and talk to him. He will ask to help him find Rosa. Go to the
top right area by the waterfalls. Here you will find Rosa. Cecil heads up, and they embrace, and run off. Now go to Rosa's
house, and speak to Cecil. Afterwards, return to the inn, and rest up.
Day 4
Return to Rosa's house, and speak to Rosa and Cecil. Now return to where you found Rosa, and examine the mark on the ground. This is some good evidence. Now head to the room where they were holding the lance. Speak to everyone in the room, and you will discover, that the lance has been stolen. There is nothing more to do, so head to the inn. When you get there, you will find the lance. Shortly after, the Captain of the guard comes in with some soldiers to detain you. Go to the door, and speak to the soldier. You cannot leave yet, so turn in.
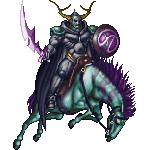
When you wake up, you will find that the soldier guarding the door is dead. Head outside, and enter Rosa house. You will find the monster trying to abduct her again. Chase the monster down, and catch it. You will find it is a soldier in disguise. The Captain thanks you for you assistance, and takes the guard away. When you return to the inn, you will find the lance. Take it, head outside, and you will see Cecil. Follow him into the serpents room. This time, the door to the Serpent's Road has been opened. Head inside, and you will find Cecil down on the ground, and Rosa tied up. A voice will talk to Kain, and ask if he would like to finally see Rosa as his, and Cecil out of the picture. If you choose to fight Cecil, you will be thrown out of the trial, and not be allowed back in. If you choose no, (and who wouldn't) you will face the boss of this trial: Lunar Bahamut.
 |
This is a one on one with Kain. He will start out as a Dark version of Kain, before turning into Bahamut. Place Kain in the back row, to take as little damage as possible. Bahamut is a counter attacker, so every time you strike, he will strike back. Otherwise Bahamut simply counts down to his Mega Flare attack. There is a trick to missing the Mega Flare, and it is when to jump. The commands will come up between 2 and 1, on his countdown. Hit the jump command, but do not execute it, until he counts 1. The second one hits the screen Execute the command. Kain should jump, and miss the Mega Flare. When he lands, Bahamut will strike him. Being in the back row, the Damage should be minimal. If you get down to 1,000 HP, throw up a Lunar Curtain, and use a X-Potion, then continue with the strategy. With all luck the Mega Flare used will bounce off you, and destroy the dragon god.
For defeating Bahamut, you will get the Grimoire LB. |
When the battle is over, you will get two items. Dragoon gloves increase Kain's power, as well as make his Jump into Double Jump. This causes 2x the damage that the normal jump command does. You will also get the Abel's Lance. This lance is not only Kain's ultimate weapon, but it randomly casts Tornado on enemies. The nice thing is it does it even to enemies that are immune to wind. When you are finished, you will be transported back outside to join your group.
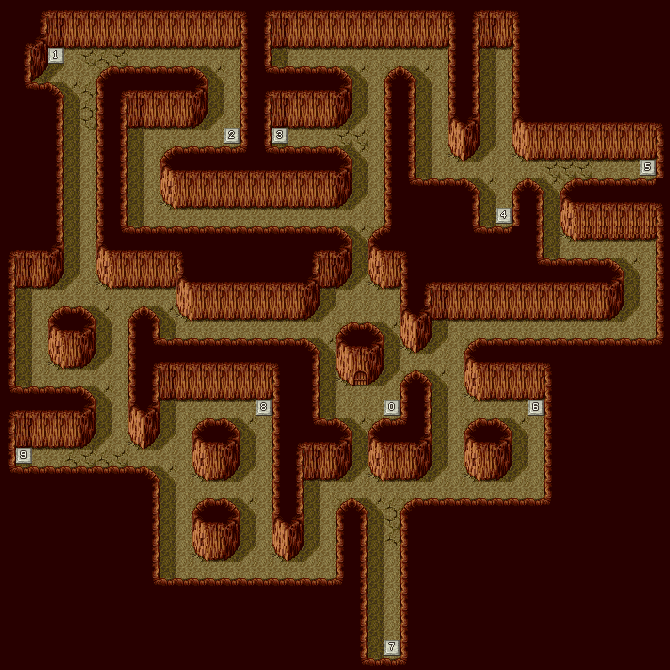
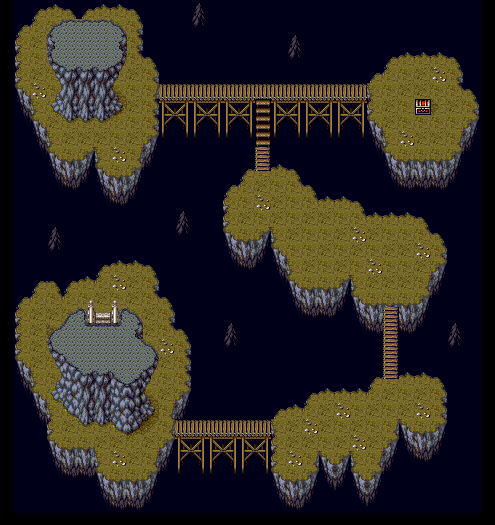
Cid's Trial
 |
Destinations in order
1- Mysidia
2- Troia
3- Fabul Castle
4- Kaipo
5- Agart
|
Cid's trial is actually the simplest of them all. You simply have to take a passenger from one location
to another, in a set amount of time. When you enter the trial, you will be taken to the world map. Enter your airship, to begin everything.
A man needs to go to Mysidia 1 minute and 20 seconds.
There, a white mage needs to go to Troia in 1 minute.
A monk
will ask if you could take him to Fabul in 40 seconds.
Another man asks if you could take him to Kiapo, in 35 seconds.
A boy will ask if he could be taken
to Agart in 30 seconds.
Once you get to Agart, you will re-board your airship, and there will be a flash of lightning. It is time to face the boss of the trial.
 |
Lunar Ramuh is easier than you might think. He counters every attack with Thundaga. He can also use Blitz, and a combination of the two spells otherwise. Take your time, and attack carefully. If your HP get too low, stop attacking, and have Rosa heal, or someone use a Megalixir. He won't counter summons or Yang's Power/Deadly ability. So those should be your major hitters. When he is zapped from the picture, you will get the Grimoire LR. |
After the battle, if you get everyone to their destinations on time, you will get the Fiery Hammer for
Cid. This is his best weapon, and it will randomly cast Flare when it strikes an enemy. Not too bad, especially when combined with Kain and Cecil's two spell casting weapons!
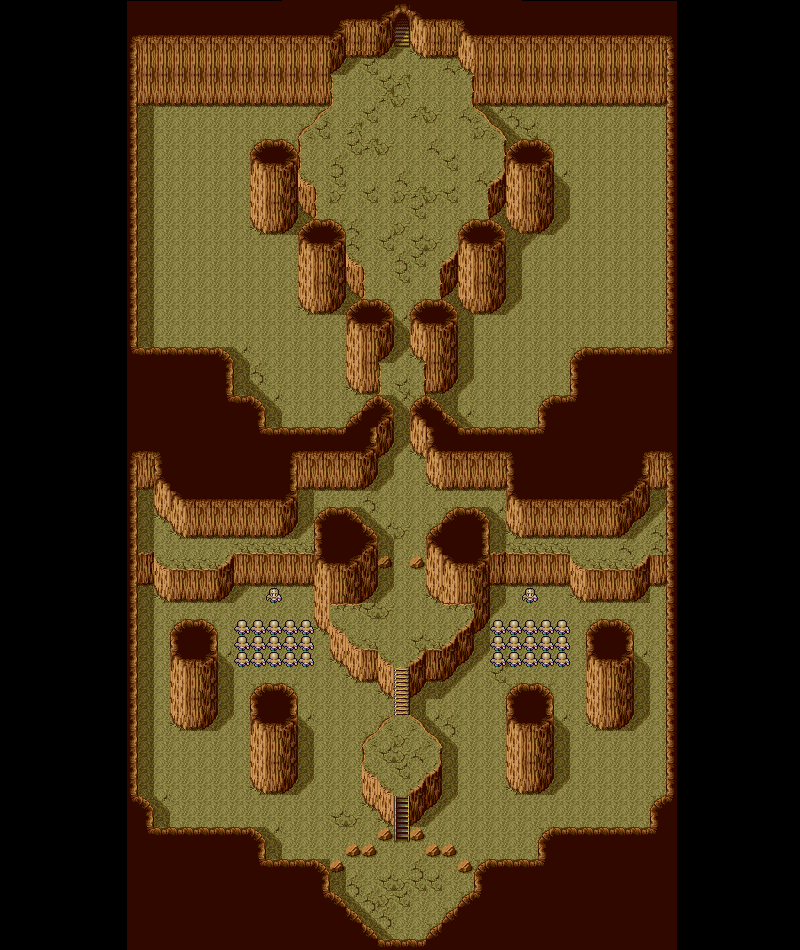
Palom & Porom's Trial
You enter the twins trial, only to find the passage is blocked. Read the note under the hole in
the wall, and you will get the drift of what is about to take place. The two mages then split up, and each find a doorway.
Go to either one of them, and talk to them. Then they will both enter their trial.
This trial is based on the teamwork of the twins. You cannot advance one without the others help. There are several colored
blocks in the trial as well. Each has a symbol on it, of a certain status. These blocks will cause/cure that status effect.
So be careful, when doing random battles, as you might want to get rid of the status during the fight.
In the first room, have either Palom or Porom (depending on which one you went to) hit the switch
on the wall. A short scene will ensue, where they figure out what is going on, then switch over (using the L and R buttons)
to the other, and do the same. Then head into the next area.
As Porom:
Head into the room, and step on the Yellow stone, to induce the Mini effect. Now head to the left, and step on the blue stone with the wing on it to induce levitation. Now head across the broken tiles, and hit the switch on the wall, and switch over to Palom.
As Palom:
In the new area, and watch the scene with the toad. Afterwards go to the right, and step on the toad slab. Now head back to
the center, and go through the hole in the wall. Press the switch, opening Porom's door, and head back through the hole. Now
go back, hit the slab again, and head into the next area. Switch back over to Porom, and do the same.
Here it is pretty cut and dry.
As Porom:
Go into the new area. Watch a short scene in here, Go through the hole, and hit the switch to the right. Now head for the
door to the left, watch the scene, step on the pig slab, and head into your new area. Now switch over to Palom.
As Palom:
Simply head through the area, stepping on the pig stone along the way.
As Porom:
In the new area, head to the right, and step on the large floor switch. Now go through the hole, and switch over to Palom.
As Palom:
Step on the Mini slab to the left, and head through the hole. Now hit the switch and go through the pink door. (if you got
rid of your piggy status, you will have to backtrack to the previous area to get it back)Now you can switch back to Porom,
and head into the new areas.
As Palom:
In this new area, head over, and step on the float slab. Cross over the broken tiles, cast Toad on yourself. If you want to,
step on the pig slab to remove the pig status. Go through the first hole, and step on the floor switch to the left. If you
kept the Mini status, go through the second hole, and go over to the green switch on the floor. If not, you need to switch
over to Porom. Do not step on the green switch yet. Switch over to Porom instead.
As Porom:
Go through the first room, stepping on the pig slab to enter the pink door. In the new room, head right, then down to the
float slab. Activate it, and cross over the broken tiles. At the first left, head over, and then down through the doorway
on the lower wall. In here, hit the switch on the wall, (if you lost the Mini status on Palom, switch back, and return to
the doorway you passed in the new area. it will be open now, and you can go in, and hit the Mini slab.) and continue through
the door on the right. go through the next room, stepping on the toad slab, and continuing through the hole to the top. Once
in there, you can remove all statuses on either twin, and have them both step on the green switches.
Once you step on the green tiles, there will be a short scene, where the column blocking the main path will come down. The
twins will then re-join the party, and you can now move forward. in this new area, you will face the trials boss, Lunar Leviathan.
 |
Lunar Leviathan will begin this fight with Tidal Wave right off the bat. This can easily cause between 1500 and 2000 HP damage to the party. Make sure that Porom is ready to begin healing everyone immediately.
Have Palom cast Thundaga on the beast, or if you want a faster spell time, use Flare. Have all your attackers focus on just
physical attacks. Edge can use Blitz, but it does not do significant damage to warrant it. Lunar Leviathan has a nasty attack called Maelstrom, which reduces all characters HP to single digits. Have the very next person either use a Megalixir, or an Elixir on Porom, so she can get everyone Back up, if they fall. His other attack is Blizzaga, which can do about 1500 damage to you. Just keep everyone healed at all times, and you should be able to overcome this sea god.
For defeating him, you will get the Grimoire LL. |
After mopping up the mess, you will find a set of Twin Stars. These rings will allow Palom and Porom to cast Double Meteor with their twin attack.
You can exit now, and continue to the final area.
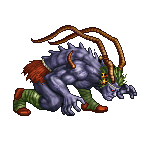
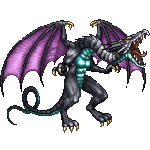
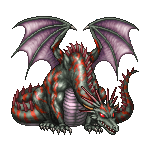
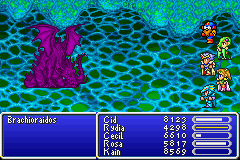
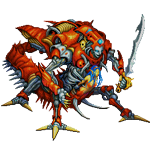
Brachioraidos
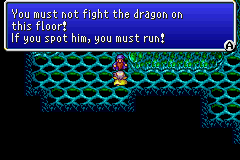 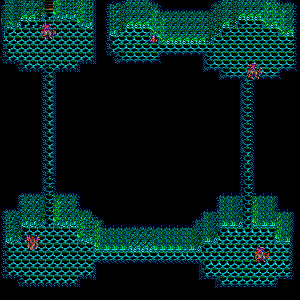 On your way to face the final confrontation of the ruins, you might hit an area similar to the Sylph cave. You will notice a old man in blue, standing just to the right of you. If you talk to him, he tells you of the terrible foe in this area, and suggests you run if you see it. This foe is non other than Brachioraidos. He is by far the most difficult boss in the entire game. On your way to face the final confrontation of the ruins, you might hit an area similar to the Sylph cave. You will notice a old man in blue, standing just to the right of you. If you talk to him, he tells you of the terrible foe in this area, and suggests you run if you see it. This foe is non other than Brachioraidos. He is by far the most difficult boss in the entire game.
There are several things you will need in order to prepare for this fight. First, make sure everyone has completed their trials. This will make for an easier time, if you go for a different character choice than mine. You will definitely need to be above level 75. All my characters were actually around 79-80. You might even want to return to the Lunar surface, and by 99 Elixirs from the hummingways. Make sure you also have at least 50 Phoenix Downs, and try to have 3-4 of the Grimoire items, for some easy damage.
Above everything else, you want to make sure you completed Kain's trial successfully, and got his Abel's Lance. This is crucial to winning the fight.
I went in with a party of Kain, Cecil, Rosa, Rydia, and Cid. Each of their trials had been finished, and they each had their
ultimate weapons. Rydia, and Rosa were equipped with ribbons. The choice for having Cid was his Fiery Hammer's ability to
cast Flare. Once you are ready, step into the dragon to initiate combat.
 |
This is one heck of a fight. Brachioraidos can wipe out a single character with his Glare attack,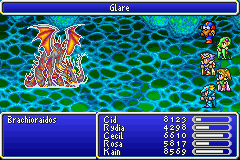 hit two targets at once, and also has a single hit attack. Make sure Rosa is poise to do nothing but heal, and revive fallen
allies. If you are in dire, and feel lucky, have Rydia summon Asura for a HP boost. Otherwise, have her throw Grimoire's or
cast Flare. I would say summon Bahamut, but it takes longer, thus causing you to lose attack time. Have Cid, Cecil, and Kain
attack, attack, ATTACK! hit two targets at once, and also has a single hit attack. Make sure Rosa is poise to do nothing but heal, and revive fallen
allies. If you are in dire, and feel lucky, have Rydia summon Asura for a HP boost. Otherwise, have her throw Grimoire's or
cast Flare. I would say summon Bahamut, but it takes longer, thus causing you to lose attack time. Have Cid, Cecil, and Kain
attack, attack, ATTACK!
Somewhere into five minutes of the fight, Brachioraidos will begin a countdown. Stop all attacks. If you strike during the
count, he will eliminate a character with Globe 199. when his countdown reaches 0, he will cast Reflect, Protect, and Black
Hole to rid your characters of their magical assistant spells. Now he gets really, really nasty.
He will now cast triple spells every turn. The first set being Blizzaga, Firaga, and Thundaga. The next triple spells will
be Bio, Holy, and Flare. I am not sure, but it seems that Flare is always cast on someone different than the other two. This
set of attacks can wipe the party out with little to no problem. And this is where I always bit the dust. Your only known
hope of defeating Brachioraidos is that Kain's Abel's Lance will cast Tornado, before he casts Reflect on himself. If it happens afterwards, Tornado, as well as Cecil's Holy, and Cid's Flare will be bounced back to you. This just makes the battle near impossible. So try to get the Tornado before hand.
Thus far I have had no success in defeating him any other way, than Kain successfully casting Tornado before Brachioraidos
can cast Reflect. If anyone else has done so, let me know how you did it, and I will add your strategy into here.
 For defeating this terror of the ruins, you will get the Hero's Shield. This shield can be worn by anyone in the party, and has the ability to absorb all elemental spells. Definitely a great asset to the party. For defeating this terror of the ruins, you will get the Hero's Shield. This shield can be worn by anyone in the party, and has the ability to absorb all elemental spells. Definitely a great asset to the party. |
You know, there is a way to get enough Hero's Shields for everyone. If you leave the Lunar Ruins, and return, guess who will be roaming this floor again, and again, and again?!?!
The Final Battle
There are a 1-3 floors between Brachioraidos and the final battle. In the final room, you will find
a black orb, which allows you to use a cottage and save. If you move to the south, you will find a warp back to the surface.
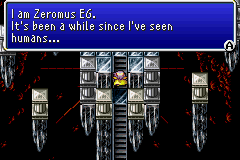
Before challenging Zeromus EG, (EG stands for easy game, where the sprite was originally used.) I would suggest a few things
to be gotten.
Complete everyone's trials. Even Kain's trial should be properly completed.
Make sure everyone is equipped with Ribbons
in your fighting party.
I would suggest going with the original group of characters, though it is not necessary to do so.
My group of choice was the original, Edge, Rydia, Kain, Cecil, and Rosa.
Have all characters at level 70 or above.
For Cecil, give him the Lightbringer, and the Caesar's Plate.
Kain should Have his Abel's Lance, Dragoon Gloves, and Dragoon
Plate.
Edge should have Mutsunokami, and Sasuke's Katana, Assassin Vest, and exchange his Hanzo Gloves for something like
a Protect Ring.
For Rosa, give her the Perseus Bow, arrows, White Dress, and White Ring.
Finally, give Rydia her Rainbow
Robe, Assassin's Dagger, and Mist Ring.
Make sure you have about 7-10 Megalixirs, 5-7 Elixirs, over 25 Phoenix Downs, and
as many Remedy's as possible. This will actually take a bit of strain off of Rosa, if things get a bit hairy.
when you think you are ready, head into the battle.
 |
 When you head into battle, get everyone set up. Have Cecil and Edge attack, Kain jump, Rydia summon Dragon, and Rosa begin healing. Even if it is not required right now. When you head into battle, get everyone set up. Have Cecil and Edge attack, Kain jump, Rydia summon Dragon, and Rosa begin healing. Even if it is not required right now.
Zeromus EG has quite a few nasty attacks up his sleeve, but still the one to worry about is the Big Bang. You can no longer have Edge steal the Dark Matter to reduce its potency. Also he no longer shakes before executing Big Bang. So you will never know when it is going to happen. He can also cast Flare, Holy, and Meteor. Though, it should be noted that Meteor is not as deadly or as often as you might imagine.
He can also reduce a character into single digits with Whirl. Be sure to heal them quickly as you can. He can easily wipe them out if you do not.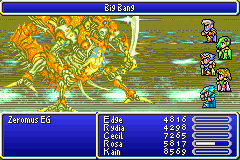
He also has the ability to cast Pig, Toad, and Mini on one or more characters at a time. The Ribbons will help out greatly here, otherwise, make sure to get the effected ones cured asap.
Keep the heat on this monstrous foe, and everything will be over soon. For defeating this boss, you get..........the satisfaction of knowing you have just done everything in the Lunar Ruins! Whoopee! |
Once you have defeated Zeromus EG, you can leave the Lunar Ruins. If you defeated him before completing all the trials, you can now go back, do them, and defeat him again. If you have completed the trials, all the trials will no longer open for you. That is all there is to the Lunar Ruins. If you find that they are overly difficult, or you are dying too often at any time, you might want to return to the Lunar Sub terrain and level up. Otherwise, congratulations on beating all of Final Fantasy IV Advance.
|