|
Final Fantasy XII Hidden Espers
As you may know, you gain 5 Espers within the storyline of Final fantasy XII. But this is less than half of the total Espers you can aquire. Here, you will get the inside scoop on what is required to find these remaining powerful beings, that were condemned by the Scions. Some are fairly easy to get, while some others are dowm right insane to get. But once you have obtained them, you will know why you want to even bother getting them in the first place.
Though it is not needed to complete the game in any fashion, getting the remaining Espers not only will give you some massive power on your side, but it will also give you some major leveling up and LP. That should be reason enough to get them on its own. I will begin with what I think is the easiest to gain, and go through the most difficult.
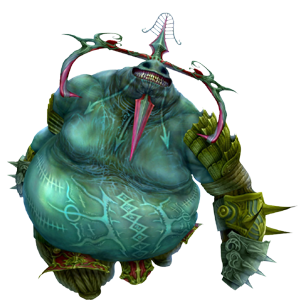
Adrammelech
 |
Adrammelech |
 |
 |
 |
 |
 |
 |
 |
 |
| - |
AB |
W |
- |
- |
- |
- |
- |
| LV |
HP |
MP |
Str |
M.Pwr |
Vit |
Spd |
Att |
Def |
M.Res |
Eva |
Exp |
LP |
CP |
Gil |
| 39 |
39630 |
999 |
38 |
30 |
79 |
22 |
60 |
25 |
21 |
0 |
0 |
42 |
4050 |
0 |
| Drop |
- |
| Steal |
Pebble, Capricorn Gem, High Arcana |
| Poach |
- |
 Adramellech is perhaps easiest Esper to fight in the game, let alone in the optional Espers, providing you are strong enough to do so. You should ba at least even with his level, before you face him. It is a lot better to be around level 45 though. You will find him in the center of the Zertanin Caverns, in the middle of the sandstorm area. When you enter, you can go a couple of steps without initiating the fight, so you basically are given a chance to back out if you need to. Be sure you are prepared to fight, before triggering the cutscene. Adramellech is perhaps easiest Esper to fight in the game, let alone in the optional Espers, providing you are strong enough to do so. You should ba at least even with his level, before you face him. It is a lot better to be around level 45 though. You will find him in the center of the Zertanin Caverns, in the middle of the sandstorm area. When you enter, you can go a couple of steps without initiating the fight, so you basically are given a chance to back out if you need to. Be sure you are prepared to fight, before triggering the cutscene.
The best way to ensure you are ready to face Adrammelech is the caverns themselves. If you are able to defeat the enemies within the caves within a single round of combat, you are more than ready for the Thunder Esper himself.
 Adrammelech is a flying esper, so you will need to have a party of ranged fighters, or equip Telekinesis. Adrammelech is constantly in the companionship of Shambling Corpses, that just never seem to go away. This is what will make the battle the most difficult to handle for weaker parties. It is best to get rid of the Shambling Corpses, then go for Adrammelech. If you get a high enough chain of them, the loot they drop will begin replenishing lost HP/MP. Adrammelech is a flying esper, so you will need to have a party of ranged fighters, or equip Telekinesis. Adrammelech is constantly in the companionship of Shambling Corpses, that just never seem to go away. This is what will make the battle the most difficult to handle for weaker parties. It is best to get rid of the Shambling Corpses, then go for Adrammelech. If you get a high enough chain of them, the loot they drop will begin replenishing lost HP/MP.
Both Adrammelech and the Shambling Corpses are weak to Ice attacks and weapons. If you do not have power weapons such as the Zodiac Spear, or the Dragon Whiskers, Equip a Icebrand for added damage. Blizzara from both your medics will most likely kill the little dead guys, giving you more time with the Esper. If you have Blizzaga already, this fight just became a breeze.
Adrammelech's Thundaja attack will occasionally cast Stop. Have Chronos tears ready to negate the effect quickly. It is actually a very wise choice to equip one of your medics with a Power Armlet, to ensure one of you is immune to Stop. The best way to go through the fight, is set the main fighter with Foe: Highest HP/Attack to go after the Esper, while the other two keep the Corpses at bay with spells, between healing. If you are having too much trouble, leave and return when you have leveled up a bit. |
Zeromus
 |
Zeromus |
|
|
|
|
|
|
|
|
| .5 |
.5 |
.5 |
.5 |
.5 |
.5 |
.5 |
.5 |
| LV |
HP |
MP |
Str |
M.Pwr |
Vit |
Spd |
Att |
Def |
M.Res |
Eva |
Exp |
LP |
CP |
Gil |
| 51 |
166888 |
999 |
44 |
35 |
87 |
19 |
86 |
29 |
33 |
0 |
0 |
55 |
5670 |
0 |
| Drop |
- |
| Steal |
Cancer Gem, Elixir, High Arcana |
| Poach |
- |
 Zeromus can be obtained any time after the final events of Mt. Bur-Omasace. Zeromus can be obtained any time after the final events of Mt. Bur-Omasace.
Return to the area outside the temple, and find the Acolyte at the base of the stairs. Speak to him, and he tells the party "To defeat the Empire, they need to seak out a greater power". He will then present the party with the "Stone of the Condemner". with this in hand, you can then return to the Stillshrine of Miriam. In the very back of the first room, is a waystone guarded by two Nightwalkers. Use the Stone of the Condemner to transport to the Throne of Vieled Gods, where you will meet and face Zeromus.
 The Magick command is disabled in this battle. Be sure to switch out gambits from spells to items. Arise/Raise should be swapped for Phoenix Downs, and Cura/ja/ga should be substituted for Hi-Potions. These would also work far more effectively if the Potion Lore and Phoenix Lore 1, 2, 3 are activated on all characters. The Magick command is disabled in this battle. Be sure to switch out gambits from spells to items. Arise/Raise should be swapped for Phoenix Downs, and Cura/ja/ga should be substituted for Hi-Potions. These would also work far more effectively if the Potion Lore and Phoenix Lore 1, 2, 3 are activated on all characters.
Zeromus will have Protect, Shell, and Reflect on him at all times. without magick to dispel them, you will have to endure the battle with them in place. He will also be in the company of dark Lords, and this can make the battle deadly. (No pun intended)
Since this is a physical battle, give everyone the absolute best armor, helmets and shields (if applicable) that you can get. The more defense you have, the smoother the fight will be. Your top priority is the Dark Bones. If you leave them too long, they can easily overwhelm you in numbers. So take them out first, then go after Zeromus. In fact, getting a high enough chain of Dark Lords will give you additional HP/MP boosts on occasion.
Just because magick is not an option, does not mean you are without anything else. If you have Quickenings, do not hesitate to get them going. A great Quickening chain can easily wipe up to 1/3 of his HP, and take out all of the current Dark Lords in the area. Just keep at him, until he finally drops. |
Exodus
 |
Exodus |
|
|
|
|
|
|
|
|
| .5 |
.5 |
.5 |
.5 |
.5 |
.5 |
.5 |
.5 |
| LV |
HP |
MP |
Str |
M.Pwr |
Vit |
Spd |
Att |
Def |
M.Res |
Eva |
Exp |
LP |
CP |
Gil |
| 46 |
119060 |
999 |
43 |
34 |
85 |
26 |
82 |
31 |
31 |
0 |
0 |
52 |
5400 |
0 |
| Drop |
- |
| Steal |
Libra Gem, Elixir, High Arcana |
| Poach |
- |
 Exodus is found in the Mosphoran Highwaste, high above the Babbling Vale. To get there requires a few things be done. Nothing drastically hard though. Exodus is found in the Mosphoran Highwaste, high above the Babbling Vale. To get there requires a few things be done. Nothing drastically hard though.
First find the Shrine of the South Wind and touch it. This will send the Floatweed to the sky. Now head into the "Rays of Ashen Lights". Look for a Chocobo you can talk to, and give it some greens for a ride. Now ride him across the floatweed path, and into the next area. Continue through the grassy area (Hidden on the map), and go to "Sky Reach Ridge. Continue heading towards the western edge of Babbling Vale, and hit the Shrine of the West Wind. Now go over to the boulder, and knock it down to reveal a path. Head back into the area, and Hit the Shrine of the Northwest Wind, next to the Learned Man. Save your game, and head back up the mountain. Cross the area with the Vultures, and head into the bettle.
 Items will be completely locked in this fight, so set any gambits that have items, to spells. If you have Arise in your inventory, have it set up instead of Raise. This will get everyone back up a lot faster. Items will be completely locked in this fight, so set any gambits that have items, to spells. If you have Arise in your inventory, have it set up instead of Raise. This will get everyone back up a lot faster.
Exodus loves to use Reflect on himslef alot. So either Dispel it when he casts it, or stick with a primarily physical attack. It is imparitive to keep everyone separated in this fight, because Exodus loves to use Flare and Scathe. Scathe can hit multiple characters for lethal damage. The best thing to do is have the main fighter Decoyed, so his focus remains solely on them, and have the others serve as the medics. This will keep Flare and Scathe producing a minimal amount of damage. Keep hacking away at him, healing whenever nessecary.
Near the end of the fight, Exodus will raise a Paling to prevent all physical attacks. If you can do it before hand, unleash a massive Quickening chain to end the fight. If not, Dispel Exodus, and use Darkra, or 1000 Needles. If you are at high enough levels, you can wipe him out before he has a chance to use his Paling. |
Cuchulainn
 |
Cuchulainn |
|
|
|
|
|
|
|
|
| .5 |
.5 |
.5 |
.5 |
.5 |
.5 |
.5 |
.5 |
| LV |
HP |
MP |
Str |
M.Pwr |
Vit |
Spd |
Att |
Def |
M.Res |
Eva |
Exp |
LP |
CP |
Gil |
| 45 |
126165 |
999 |
42 |
32 |
5 |
24 |
78 |
27 |
31 |
0 |
0 |
50 |
4950 |
0 |
| Drop |
- |
| Steal |
Scorpio Gem, Elixir, High Arcana |
| Poach |
- |
 In order to go after Cuchulainn, you must first complete the "Waterway Haunting", and the "Lost in the Pudding" hunt offered by Sorbet and aquire the Sulce Gate Key. In order to go after Cuchulainn, you must first complete the "Waterway Haunting", and the "Lost in the Pudding" hunt offered by Sorbet and aquire the Sulce Gate Key.
Now that you have the key, you can open and close the gates by the Save Crystal. Make sure all four are open when you begin.
1-Close No. 3, and No. 10 gates first.
2-Head into the No. 3 Cloaca Spur, and use the No. 1 South Waterway Control at the end of the area.
3-Return to the Central Waterway, and reopen No.3, and No. 10.
4-Now close No. 4, and No. 11 gates. Enter the No. 4 Cloaca Spur and hit the No. 1 North Waterway Control.
5-Return to the main area, and open No. 11, and close No. 3.
Save your game, and head into the No. 1 Cloaca Spur, and you will find your Esper in the low point of the very end of the area.
 In the fight with Cuchulainn, there will be a constant HP Sap effect, that cannot be removed with spells. Yes, that is why your characters did not automatically try to remove it. Since this can be very crippling, I would suggest holding off on this fight, until you can use Curaja. Waiting for the spell will also give you access to Firaga, which is vital in the fight too. You might want to also set everyone with Black Belts to negate his Disable spell. If you do not have them, be ready with Esunaga for those who get effected. In the fight with Cuchulainn, there will be a constant HP Sap effect, that cannot be removed with spells. Yes, that is why your characters did not automatically try to remove it. Since this can be very crippling, I would suggest holding off on this fight, until you can use Curaja. Waiting for the spell will also give you access to Firaga, which is vital in the fight too. You might want to also set everyone with Black Belts to negate his Disable spell. If you do not have them, be ready with Esunaga for those who get effected.
Start off the fight with the usual Dispel on the boss, to remove his enhancements, then set your characters up. Keep the healers in the back, and let your main fighter do the attacking. The healers top priority should be casting Curaja and Esunaga, as well as bringing back KOed members. With HP Sap, you never want to let your HP get too low.
Occasionally, Foobars will come into the fight. Quickly get rid of them with Firaga. They can confuse your characters, and that can spell your doom. Cuchulainn will also hit a character with Invert from time to time, which switches your HP and MP. The plus is you will get a full MP reserve. The minus is you will lose a lot of HP, and with Sap going you could get KOed easily. Revive anyone who falls, and keep at him. A powerful Quickening chain can also do a lethal blow towards the last bit of the battle. |
Zalera
 |
Zalera |
|
|
|
|
|
|
|
|
| - |
- |
- |
- |
- |
- |
- |
- |
| LV |
HP |
MP |
Str |
M.Pwr |
Vit |
Spd |
Att |
Def |
M.Res |
Eva |
Exp |
LP |
CP |
Gil |
| 40 |
72248 |
999 |
38 |
29 |
79 |
21 |
62 |
23 |
25 |
0 |
0 |
40 |
3600 |
0 |
| Drop |
- |
| Steal |
Pebble, Gemini Gem, High Arcana |
| Poach |
- |
 The path to Zalera is long, and has a couple requirements to fill, before you can face him. First you must have completed the "Dalmasca Desert Bloom" hunt. This unlocks the "Patient in the Desert Misc. Quest, which you also need to complete. At the end of this quest, you will be given the Barheim Key. This will let you into the passage, just before the room with the Mimic Queen. First, head north, back towards Nalbina, and activate the Teleport Crystal and save. Next, come back south, and head through the new area to the west. This will take you across a massive bridge, that seems to be blocked at the end. Look on the left side for a weak boulder you can move to make a path. Then traverse through the rest of the area to the Save Crystal in the tunnel. Save the game here, and head in to the battle. The path to Zalera is long, and has a couple requirements to fill, before you can face him. First you must have completed the "Dalmasca Desert Bloom" hunt. This unlocks the "Patient in the Desert Misc. Quest, which you also need to complete. At the end of this quest, you will be given the Barheim Key. This will let you into the passage, just before the room with the Mimic Queen. First, head north, back towards Nalbina, and activate the Teleport Crystal and save. Next, come back south, and head through the new area to the west. This will take you across a massive bridge, that seems to be blocked at the end. Look on the left side for a weak boulder you can move to make a path. Then traverse through the rest of the area to the Save Crystal in the tunnel. Save the game here, and head in to the battle.
*Note* This area is teaming with a lot of Undead enemies that are very powerful. After the bridge, they will begin coming in groups. Basically the trek to Zalera is almost more difficult than the Esper himself. You will need to be in higher levels to make the journey. If you cannot fell the Dead Bones quickly, you will not make it in the battle with the Esper.
 Ok, this battle is definitely one of a kind. You basically have 5 minutes to defeat Zalera, or you are ejected from the area, and forced to start again. That in itself makes it something of a pain in the mist. Ok, this battle is definitely one of a kind. You basically have 5 minutes to defeat Zalera, or you are ejected from the area, and forced to start again. That in itself makes it something of a pain in the mist.
But this is not the only oddity. Dead Bones will constantly join in the fight as well. Normally this would not be a problem, except that the more join, the less damage you can do to Zalera. So your top priority should be the Dead Bones, then the boss, once they are gone.
Zalera uses several "Level" based attacks. LV2 Sleep, LV3 Disable, LV 4 Break, LV 5 Reverse, and Prime LV Death. Normally, I would say avoid these by having characters on levels 41, 51, 61, Etc. But 1 is a prime number. So if everyone is on these levels, you are done for. It is down then to a choice of the evils. I would suggest any of the levels with 2. 42, 52, 62. This will also bring Break into effect, but that can be countered with Esunaga. Sleep may seem bad, but considering the amount of Dead Bones, you will be up and running very quickly. Or you can simply head into the battle as you are, and have everything ready to negate these effects right away. Remember time is everything in this fight.
Start off with Dispel on the Esper to remove its enhancements, then get rid of the Dead Bones, until they are gone. Now go for Zalera at full force. When the Dead Bones come back, quickly dispatch them, then return your attentions back to the Esper.
As the battle draws near to the end, Zalera will begin casting Sleepga, Stop, and Death. Be prepared for them, and now would be a good time to bring in your reserve with fresh MP to blast it with a large Quickening chain. |
Chaos
 |
Chaos |
|
|
|
|
|
|
|
|
| - |
- |
- |
W |
- |
AB |
- |
- |
| LV |
HP |
MP |
Str |
M.Pwr |
Vit |
Spd |
Att |
Def |
M.Res |
Eva |
Exp |
LP |
CP |
Gil |
| 57 |
208966 |
999 |
52 |
47 |
87 |
23 |
98 |
31 |
34 |
0 |
0 |
60 |
6260 |
0 |
| Drop |
- |
| Steal |
Taurus Gem, Elixir, High Arcana |
| Poach |
- |
 Chaos is found at the end of the "Nabreus's Medals" Misc. Quest, which is covered in detail in the Nabudis section. This path is very long and difficult. Not only will you need to be able to survive the Nabreus Deadlands and Nechrol of Nabudis easily, but you also must face and defeat two very powerful bosses before you can even think of Chaos. Chaos is found at the end of the "Nabreus's Medals" Misc. Quest, which is covered in detail in the Nabudis section. This path is very long and difficult. Not only will you need to be able to survive the Nabreus Deadlands and Nechrol of Nabudis easily, but you also must face and defeat two very powerful bosses before you can even think of Chaos.
And given the handicap of the battle, namingly Attack being removed from the fight, you will want your characters to be well versed in all Magick spell areas. This will be key to winning this battle.
 As mentioned before, in this fight, you have no Attack command. This can be very bad for a party without too much knowledge of Magick and Technicks. Chaos is very powerful, and cannot be defeated without a combination of the two. Chaos is also in the company of four Chaosjets that can silence party members. So make sure you set gambits with Echo Herbs or Esunaga to negate the effect. As mentioned before, in this fight, you have no Attack command. This can be very bad for a party without too much knowledge of Magick and Technicks. Chaos is very powerful, and cannot be defeated without a combination of the two. Chaos is also in the company of four Chaosjets that can silence party members. So make sure you set gambits with Echo Herbs or Esunaga to negate the effect.
The Chaosjets should be the first priority in the fight. Each has a elemental weakness that can be exploited, but it is much simpler to hit them with non-elemental area spells such as Scourge, Scathe, and Bio. If these are not available, go for the elements. Earth is weak to Aeroga, Water is weak to Firaga, Air is weak to earth, while Fire is weak to water. Just take them out one at a time, until they are gone.
After the four jets are history, you can turn your attentions on Chaos. He will absorb wind attacks, so Aero and Aeroga are not good. If you would feel like it, try to hit it with a combo of Souleater, and Bio. If you go with Souleater, a character will need to be constantly healing the user. So have one heal the character using Souleater, while the third member nails it with Bio, while not serving as a medic.
This fight is very hard, and it might take a few times. If you are having too much difficulty, then head out, and do some leveling up. Try to get Scathe, Scourge, and other top spells, if you do not ahve them, then return. |
Ultima
 |
Ultima |
|
|
|
|
|
|
|
|
| - |
- |
- |
- |
- |
- |
AB |
W |
| LV |
HP |
MP |
Str |
M.Pwr |
Vit |
Spd |
Att |
Def |
M.Res |
Eva |
Exp |
LP |
CP |
Gil |
| 63 |
258001 |
999 |
54 |
48 |
90 |
25 |
98 |
35 |
35 |
0 |
0 |
65 |
6890 |
0 |
| Drop |
- |
| Steal |
Serpanterius, High Arcana, Megalixir |
| Poach |
- |
 The path to Ultima is through the Great Crystal of Giruvegan. And the trip is almost as difficulty long as the Esper herself. I have provided a Map of the Crystal to assist in getting you there. The path to Ultima is through the Great Crystal of Giruvegan. And the trip is almost as difficulty long as the Esper herself. I have provided a Map of the Crystal to assist in getting you there.
Let us begin at Waystone VIIIand go up to the Scorpio Gate Stone. Hit the switch, and return to Waystone VIII. Go to the right, and head to waystone IX.
Now pass waystone XX, taking either the left or righ path on the opposite side. This will take you to the Sagittarius gate Stone. Return to the Sagittarius gates, and enter either one. I would go with gate I, to save a bit of time. (Gate II will take you passed Excalibur though)
Now take the rising path to the Gemini gate Stone. Hit the switch, and continue on the rising path passed it.Go passed Gemini Gate I, and go to Gemini Gate II. Now go down either of the paths without gates, to Waystone XV, and use it to get to Waystone XVI.
Follow the center path to the Libra Gate Stone. Hit the switch, then return to Waystone XVI and head right. Go through the Libra Gate I, and continue up. Follow the rising path to the left at the next platform, to reach the Capricorn Gate Stone. Hit the switch, and backtrack all the way back to Waystone XVI. Head down the path on the opposite side to reach Capricorn gate I. Go through the gate, and activate the Virgo gate Stone. Now backtrack to Waystone XVI again. Follow the center path to reach the next platform. From there you can go either left or right to get to Virgo Gate I or II. Pass through the gate, and go to Waystone XVII to reach the last area. Be sure to save your game at the Crystal there, Now enter the center path to find the Esper. (Told you it was a long trek up there, didn't I?!!)
 Ultima uses a set pattern of attacks throughout the entire battle, so you should set up accordingly. Gambits for each pattern is almost a must. Her pattern is as follows: Ultima uses a set pattern of attacks throughout the entire battle, so you should set up accordingly. Gambits for each pattern is almost a must. Her pattern is as follows:
HP Sap, MP Sap, No Attack command, No Magick Command, No Technicks, No Items, Magnetic Field, then returns to HP Sap.
Prepare for each condition, and have gambits especially for the Magick Sap, and No Items. It is wise to have a gambit for both Phoenix Down, as well as Arise, so you can switch them on the fly. Also ahve a Ally: Reverse/Dispelga set up, so you can get rid of the effect, before you go into healing. This can be a big problem, if you are unaware of the status. Best to have it automatically set up.
Ultima's special attack Holija can cause massive amounts of Holy Damage, as well as the Reverse effect. You will NEED 3 White Masks for the fight. Preferably you should have all six party members equiped with them.
The most difficult point is between the MP Sap, and No Attack. Not only do you lose MP from the sap, but you cannot replenish it by physically attacking afterwards. It can be a pain within this spot to get people healed, or get your protections up. A great idea is to bring along a very healthy supply of Ethers, Hi-Ethers and Elixirs. The other problem spot is the Magnetic Field, as it slows the party down, and makes attacking a bit harder. This is a major spot to watch the damage taken, since the field does not effect Ultima's speed. This is a great time to heal up, and get everyone ready to go through the cycle all over again.
Last but not least of the problems is the end of the battle. Ultima will begin using a beam attack which can severely damage one charcter. This is a good sign that it is time to get the battle over with NOW! Unleash a massive Quickening chain if you have the MP for it. Or you could bring in the second party with full MP for a better Quickening chain. Either way, you need to defeat her before she wastes your party. |
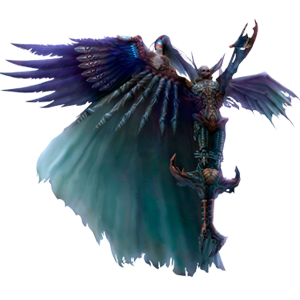
Zodiark
 |
Zodiark |
|
|
|
|
|
|
|
|
| - |
- |
- |
- |
- |
- |
W |
AB |
| LV |
HP |
MP |
Str |
M.Pwr |
Vit |
Spd |
Att |
Def |
M.Res |
Eva |
Exp |
LP |
CP |
Gil |
| 66 |
336847 |
999 |
53 |
50 |
92 |
25 |
112 |
34 |
37 |
0 |
0 |
70 |
7610 |
0 |
| Drop |
- |
| Steal |
Serpentarius, High Arcana, Megalixir |
| Poach |
- |
 You need to complete all the hunts in the Jahara area, as well as capture 10 Espers, before you can go after this most powerful Esper. Once you have completed both tasks, speak to the Geomancer Yugelu. He will have the final section ofthe Henne Mines opened for you. You need to complete all the hunts in the Jahara area, as well as capture 10 Espers, before you can go after this most powerful Esper. Once you have completed both tasks, speak to the Geomancer Yugelu. He will have the final section ofthe Henne Mines opened for you.
The most difficult aspect of this Esper is the length from the nearest Save Crystal to him. The Teleport Crystal you use to get there is the closest one. Use it, every time yo try to go after Zodiark. The path to him is pretty straight forward, but it is riddled with extremely difficult enemies. They easily surpass almost all others in difficulty. (Refer to the Henne Mines Bestiary for details on the enemies found here.) You will also need to utilize Float a lot of the times, since the paths are very narrow, and there are a lot of traps in the inner mines.
 In this fight, you will want everyone wearing Black Masks at all times. Zodiark's Darkja attack is Dark based, and these will greatly help in your ability to stay alive after it. You should also enter the fight with only one character out. This is due to the simple fact that Zodiark always begins with Darkja. There is no point in having all three out to take the attack on. Actually it is foolish to do so. Simply wait for the attack, then bring everyone out. In this fight, you will want everyone wearing Black Masks at all times. Zodiark's Darkja attack is Dark based, and these will greatly help in your ability to stay alive after it. You should also enter the fight with only one character out. This is due to the simple fact that Zodiark always begins with Darkja. There is no point in having all three out to take the attack on. Actually it is foolish to do so. Simply wait for the attack, then bring everyone out.
Zodiark will also cast Reflect, Protect, Shell, and Haste on himself throughout the battle. You should have someone automatically set to get rid of these enhancements right away, so you can stay ahead of the game.
As mentioned before, this Esper's big attack is Darkja. This is the worst attack of all the Espers combined. Not only will it hit for a mass amount of Dark damage, but it can instantly kill 1 or all of your party. There is nothing that can be done about this, even the Black masks cannot stop the instant kills. But they can help in the damage dealt.
The survival of this battle depends on how well and fast you can react to the Darkja attack, when members fall. Everyone should have either Arise or Phoenix Down gambits in the top spot. If you are using Phoenix Downs, be sure to equip the characters with Pheasant Natsuke's, to increase the amount of HP restored. You should also have every Phoenix Lore opened on the Licence board. If your entire party gets wiped out, bring in the reserve members, and get your main attackers back up. Unless you have spent a great deal of time leveling your second party, they will not be high enough to last too long in battle. As soon as the main party is back in the game, take a moment to get the second party back, through the command screen. Remeber that you can heal and restore HP, without bringing the character into battle. And be expecting to do this quite often. This will also become critical near the end of the fight, when Darkja is not the only attack you have to worry about.
The first portion of the fight is pretty easy. If you have any Holy weapons such as Excalibur or Holy Lance, equip them to your main fighter. Now set him up with Berserk, Bravery, and Haste. With all of this in play, he can easily hit for 9999 each shot. If you equip the Genji Glove, he can do 2-3 hits per turn.
When Zodiark hits about half way through his bar, he will begin casting Magick Shield. This prevents any magickal attacks from working. This includes Dispel. Now would be a good time to make Dispel a manual command, this way you can get it off between Magick Shields. Otherwise, keep up with the basic strategy you are using now. It would also be a good time after this point, to stop using Berserk. After this point, it will get more difficult to bring back fallen members, and you will need all three able to do so.
When the boss nears the final 1/4 of his HP, things will get real ugly. He will begin by using something called Shift. This will shift his elemental weakness from Holy, to something else. You should now trade out your Holy weapon for something non-elemental such as the Zodiac Spear. Now would also be the single best time to unload a massive Quickening chain. If you can knock him out with one, you will save yourself the grief and frustration of the battle ahead. If you do not get it off in time, here is what to expect. He will next use both a magick shield, as well as a paling. He will become compeletely immune to anything you can thow at him. While the Magic Shield will go down for extended periods, Paling will only go down for a second or less. This is the point where physical attacks become impossible. It is time to make a set up for a magickal onslaught. To save yourself the trouble of even trying to Dispel Reflect from Zodiark, equip your primary party with Opal Rings. This will allow your spells to get through reflect. Then make sure to set your gambits to Arise instead of Phoenix Down. Now bring out the Scathe spell, and let him have it. Being that the Magickal Shield is down longer, you will be able to get more damage in this way. As your MP gets low, replenish it with Ethers, Hi-Ethers, or Elixir/Megalixirs. when the boss is almost completely gone, he will drastically speed up, and uses Darkja with almost every attack. Just be patient, plan everything out carefully, and take it slowly. You will come out victoious. |
|